The full guide: How to build a golf simulator at home
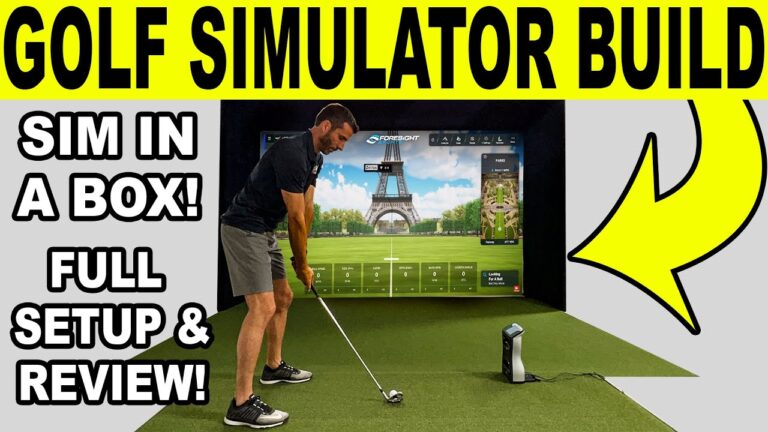
This is the affordable DIY home golf simulator GSV built in 2021, one person, in about an hour: a 24/7 Golf Simba enclosure 10 ft wide, a short-throw Optoma projector bought on eBay, foam gym tiles and putting turf, a 24/7 Golf hitting mat, and a FlightScope Mevo+ and a SkyTrak to show both kinds of launch monitor. Jay Lasco, host of Golf Simulator Videos, put the whole thing together by himself on camera, and everything but the launch monitor came in under $2,700. It is the most watched video on the channel. Here is every part, the setup distances, how it went together, what it looked like on the screen, and the parts that fill each spot today.
- Under $2,700Everything but the launch monitor, in 2021
- 10 ft wideThe enclosure, about 8 ft 6 in tall and 5 ft 3 in deep
- About 1 hourTo build alone, with a custom projector mount
- 7 ftFrom the projector to the screen
Building one like it today? A SIG10 is the closest size from GSV's partners, and GSV's code GSV250 takes $250 off it at Shop Indoor Golf.
A build like this one, with today's parts
- SIG10 enclosure$250 off at Shop Indoor Golf with code GSV250.SIG8, SIG10 and SIG12 enclosures and studios, DIY and commercial enclosures, G-TRAK screens, SIGPRO flooring and complete simulator packages.
- SkyTrak ST MAXGSV code for SkyTrak: GOLFSIMULATORVIDEOS.Applied automatically through the GSV link.
- FlightScope Mevo Gen25% off at FlightScope with code GSVMEVO.
- Optoma GT2000HDR5% off at Shop Indoor Golf with code GSV5OFF.First-time buyers only, one use. Not valid on a standalone Trackman, the Square Golf launch monitor or the ProTee VX.
Will it fit? See each in your room in the free GSV Sim Builder, in 3D: SIG10, SkyTrak ST MAX, Mevo Gen2, Optoma GT2000HDR.
Buying through GSV's links and codes helps support the channel: GSV earns a small commission at no extra cost to you, and you still get every saving available.
Every part in the build
| Part | What GSV used | Notes |
|---|---|---|
| Enclosure | 24/7 Golf Simba, the smallest size | 10 ft wide, about 8 ft 6 in tall, 5 ft 3 in deep |
| Projector | Optoma GT1080HDR, bought on eBay for $400 | Short throw, about 0.5, with a speaker built in |
| Projector mount | A 2 ft extension mount | Bolted through the enclosure's top center pole |
| Floor | Foam gym tiles, under $100 | Putting turf on top, about $90 on eBay |
| Hitting mat | 24/7 Golf hitting mat | Room for a left-handed golfer too |
| Launch monitors | FlightScope Mevo+ and SkyTrak | Shown one after the other |
| Software | E6 Connect and Awesome Golf | On an iPad, with HDMI to the projector |
The $2,700 covers the enclosure, the mats, the foam under them, the projector, the mount and the HDMI cables, as Jay priced it in 2021. The launch monitor is on top of that. The enclosure and mat came from 24/7 Golf, and the 2021 links and code for them are out of date, so the parts for today are further down.
The room and the setup distances
The build went up outside the usual GSV studio, on a flat floor. The numbers that matter for planning a room like it:
- Enclosure: 10 ft wide, about 8 ft 6 in tall and 5 ft 3 in deep, so a room needs a little more than that in each direction to put it up.
- Mevo+: 8 ft from the unit to the ball, and a little over 9 ft from the ball to the screen. A radar unit like this sits behind the golfer, so it needs the room depth behind the tee as well.
- SkyTrak: beside the ball, so it needs no room behind the golfer. It sat on the runway laid for the Mevo+ in the video, but it can sit on the floor, where the software asks for the tee height.
- Projector: 7 ft from the screen, hanging from the enclosure's own frame.
The room size checker tests a launch monitor against a room's width, depth and ceiling, and the Sim Builder link further down starts with a build this size.
The enclosure: one piece over a metal frame
The 24/7 Golf Simba came in three sizes: this one, 10 ft wide, 8 ft 6 in tall and 5 ft 3 in deep; a 10 x 10 x 10 ft, whose extra depth makes it easier to hang a projector and darker inside; and one 13 ft wide, 10 ft tall and 10 ft deep with a 4:3 screen. The smallest one is the one that fits most rooms, and it still felt immersive.
- Metal poles that snap together. No PVC to buy and piece together, and one person can build it.
- The cover is one piece around the poles, so there are no gaps for a ball to sneak through or get stuck in. Industrial-grade Velcro wraps the poles to tighten it.
- Straps on the back tension the screen. Jay set it taut enough to take out most wrinkles while a fast ball still drops down instead of bouncing back.
- The screen sits in front of the back poles, with a gap, so a ball never hits a pole and bounces back, and the enclosure can stand right up against a wall. Padding around the screen is included.
The projector and the mount
The projector is an Optoma GT1080HDR, bought on eBay for $400. Its short-throw lens, about 0.5, fills the 10 ft wide screen from 7 ft away, with thin black bars at the top and bottom. On a PC, the NVIDIA control panel can stretch the picture to fill almost all of the screen; with the iPad it stays plug and play. The projector's own speaker carries the course sounds, from the birds to the ball landing.
The mount is a 2 ft extension mount on the enclosure's top center pole. Jay drilled two holes through the pole and fixed it with big bolts and washers, then ran the HDMI and power along the same pole, and squared the picture with the aspect ratio and keystone settings with the lights off. The golf simulator projector guide covers throw distance and brightness for each screen, and how high a lens like this has to sit.
The floor and the hitting mat
Foam gym tiles go down first, under $100 for the square feet needed, with putting turf on top, about $90 on eBay after an offer. The result is level, so a putt rolls true right up to the screen. The hitting mat is 24/7 Golf's: compact, with room for a left-handed golfer, and forgiving on the elbows and wrists without hiding a fat shot.
- It stays put. A club grounded right next to the ball does not move it, which matters for a SkyTrak, since the unit sits beside the ball.
- The fibers are deep, past the first knuckle of a finger, so the club can go into the mat a little, but not so long that a fat shot flies like a good one.
The golf simulator flooring guide covers foam, turf and setting a mat in level.
How it went together
- Lay out the foam tiles, and the turf over them for now.
- Click the metal poles together into the frame.
- Drape the enclosure over the frame and tighten it with the Velcro. A few poles went in the wrong spot the first time and were easy to swap.
- Tighten the straps on the back.
- Fit the padding around the sides of the screen.
- Build the projector mount, drill the top center pole, and bolt the projector on.
- Run HDMI and power, connect the iPad, turn the lights off and adjust the picture.
- Hit a few shots in FS Golf, then go into the software.
Jay built it all alone in a little over an hour, the custom projector mount included, and reckons about 30 minutes a second time, knowing where the pieces go. The enclosure had no instructions yet, since it was brand new.
On the screen
First came the Mevo+ in E6 Connect for iOS, on an iPad with an HDMI adapter and a metallic dot on the ball. A thin 9 iron carried 141 yards with 6,821 rpm of backspin, and a better one in Awesome Golf carried 145 with 7,414 rpm, about normal for Jay's 9 iron after a long day of building. Then the SkyTrak in its iOS app over Wi-Fi, in a three-shot challenge, with a fat one in the middle for an honest example of how the mat lets you know.
The ball drops close to the screen, about a foot from it even on a shot hit hard. Jay has watched homemade screens send balls flying back, and found he could tighten this one a little more. The bounce-back guide covers what makes the difference.
The same build with today's parts
Much of this build has moved on since 2021. The table sets each 2021 part beside the one in that spot today, at the prices GSV last checked, in October 2026:
| Spot | In 2021 | Today |
|---|---|---|
| Enclosure | 24/7 Golf Simba, 10 ft | SIG10, 10 ft 10 in wide, $1,999.99, or $250 off with GSV250 |
| Projector | Optoma GT1080HDR, a lamp model | Optoma GT2000HDR, laser, 1080p, 0.496 throw ratio, $1,199 |
| Radar launch monitor | FlightScope Mevo+ | FlightScope Mevo Gen2, $1,299, 5% off with GSVMEVO |
| Camera launch monitor | SkyTrak | SkyTrak ST MAX, $2,995 list |
| Hitting mat | 24/7 Golf mat | SIGPRO Softy mats, $20 off with GSVMAT |
- The SIG10 is the closest size from GSV's partners: the same 10 ft class, 8 ft 4 in tall and 5 ft deep. Jay built one himself in 2023, and the SIG10 review covers its room, its parts and how it goes together. For a narrower room, the budget golf simulator guide prices a SIG8 build part by part.
- The Optoma GT2000HDR is the laser model with a lens of about 0.5 in Optoma's golf line, so it fills a screen from about the same distance the GT1080HDR did. GSV has not reviewed it; the Optoma golf projectors page sets it beside the others.
- The Mevo Gen2 is FlightScope's current unit, and the Mevo+ the older model. The Mevo Gen2 vs Mevo+ page has what changed.
- The ST MAX is SkyTrak's current unit, and SkyTrak runs sales on it; the ST MAX review has the price and the plans. A unit beside the ball, like the ST MAX, or the Square Golf Home Edition at $699, saves the room behind the golfer that a radar needs.
$250 off at Shop Indoor Golf
SIG8, SIG10 and SIG12 enclosures and studios, DIY and commercial enclosures, G-TRAK screens, SIGPRO flooring and complete simulator packages.
Code last checked August 19, 2026.
Open a build like this in the Sim Builder
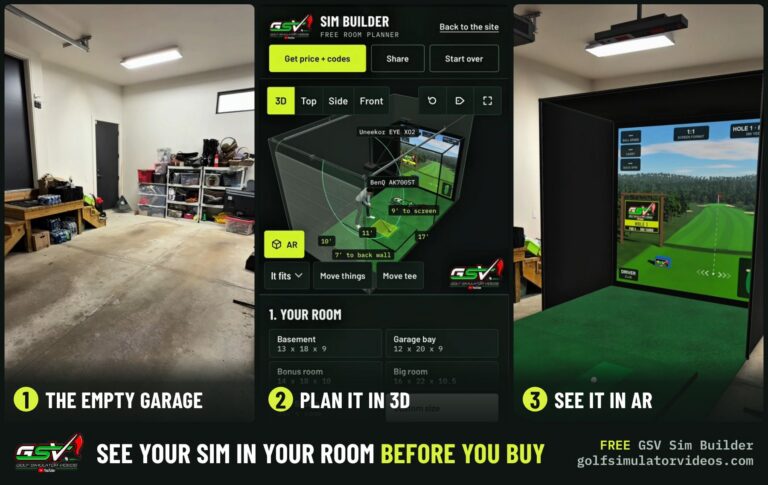
The GSV Sim Builder lays out an enclosure, a launch monitor, a projector and a mat in a room, in 3D, and checks the swing, the ceiling and the distances. The Simba is not in it, so this link starts with a SIG10, the same size class, and a SkyTrak ST MAX beside the ball. Enter your own room and swap in any launch monitor.
Open this build in the Sim Builder
Get a package deal on a build like this
Want a build like this one without sourcing every part yourself? Jay works with official partners: master builders he hand-picked, who get on a call quickly and make sure the enclosure, the projector, the launch monitor and the room work together before you buy anything. They offer package deals on the whole build, DIY packages, full installation, and more. The consultation is free.
DIY golf simulator build questions
How much did the affordable DIY golf simulator cost?
Under $2,700 in 2021 for everything but the launch monitor: the 24/7 Golf Simba enclosure, the hitting mat, foam gym tiles and putting turf, an Optoma GT1080HDR projector bought on eBay for $400, a 2 ft extension mount and the HDMI cables.
How big is the enclosure in this build?
The 24/7 Golf Simba in its smallest size: 10 ft wide, about 8 ft 6 in tall and 5 ft 3 in deep. It also came 10 x 10 x 10 ft and 13 ft wide with a 4:3 screen.
Can one person build a golf simulator enclosure?
Yes. Jay built this one alone in a little over an hour, a custom projector mount included, and reckons about 30 minutes a second time. The metal poles snap together and the cover goes on in one piece with Velcro.
How far from the screen is the projector?
7 ft, on a 2 ft extension mount bolted through the enclosure's top center pole. The Optoma's short-throw lens, about 0.5, fills the 10 ft wide screen from there with thin bars at the top and bottom.
How far behind the ball does the Mevo+ sit?
8 ft from the unit to the ball, with a little over 9 ft from the ball to the screen. The SkyTrak sits beside the ball, so it needs no room behind the golfer.
What would this build use today?
A SIG10 enclosure at $1,999.99, or $250 off with GSV250; an Optoma GT2000HDR laser projector at $1,199; a FlightScope Mevo Gen2 at $1,299 (5% off with GSVMEVO) or a SkyTrak ST MAX at $2,995 list; and a SIGPRO Softy mat, $20 off with GSVMAT.
Is there free help planning a build like this?
Yes. Jay offers a free consultation with GSV's partner master builders, hand-picked by Jay, who check that the enclosure, the projector, the launch monitor and the room fit, and offer package deals, DIY packages and full installation.
More GSV builds
Full video transcript
Hey guys welcome back to golf simulator videos man do we have an incredible video for you today as you can see I'm not in the normal gsv studio we actually get a question all of the time it's everyone looking to do a home golf simulator build but on a budget well guess what we did we found the most affordable high quality products and built ourselves a golf simulator all right a totally DIY affordable home golf simulator and I'm here to tell you guys all about it let's go all right guys so here we are in my all-new home golf simulator all right this is probably the most impressive DIY affordable home golf simulator that I could have ever thought of and it has a lot to do with the components that I found all right so there's a lot in this video all right so make sure you stay tuned the whole time I'm going to show you guys a time lapse of how I built this and when you talk about DIY golf simulator well I actually did this completely by myself and you're going to see in a time lapse how I actually assembled everything in only just over an hour if you can believe that even with some custom work we'll talk about along the way all right so and then just so you guys understand I already have worked out with my partners a discount code that will be available all right for especially the enclosure which is kind of going to be the hero of the show we'll talk about in just a second all right so whether you're looking for a full package or you're looking maybe just for the FlightScope Mevo+ or skytrak whatever it may be but make sure you reach out to me all right my email will be in the description and it will be pinned to the top of the comments um and I'm also going to put links to some of these value items that I found in the description as well but let's go ahead and get started alright there's a lot to talk about I'll try to kind of move through this quickly in the beginning show you the time lapse we'll do some demo shots and wrap things up all right so first let's talk about like I said the hero of the show the 24/7 Golf Simba I say hero the show because a lot of things one I have people that reach out all of the time all right I'm doing my first home golf simulator where do I start I have a space that's only this big and I only have this much budget what do I do well an enclosure like this really solves a lot of that the reason is because it comes in three different sizes and this is the smallest size which is going to accommodate for a lot of people because it's only 10 feet wide it's only about eight and a half feet tall and five and a quarter feet deep all right and it gives you a plenty you know good immersive experience all right but yet can fit into those smaller spaces and it's actually quality all right it's not a screen that rips after so long and you're not out buying pvc trying to piece things together it's all included metal piping that snaps together easy you'll see that in the time lapse here in a minute and you can build these by yourself only one person that's why I said you talk about DIY this is truly do it yourself home golf simulator all right so let's talk a little bit about the enclosure first so I told you this is the smallest size you can also go up to a 10 by 10 by 10 that's going to give you 10 tall and then 10 deep so when that enclosure gets 10 feet deep it makes a little bit easier to put a projector on there we'll talk about my projector and mount here in just a second but it also kind of gives you a little darker area a little more immersive all right if you can fit that and then there's also a version that goes 13 wide and then it's 10 by 10 and that's the perfect 4x3 ratio screen it just depends on what you're trying to do I'm using an iPad today and I'll tell you what we can talk about you know the projector really quick this is a great image I mean it's filling up that full 10 foot wide screen and I just have little black bars in the top and bottom and for you know the price that this thing's coming in at I think it's a fantastic setup and it's plenty immersive for me so I'll talk about the projector really quick because just so you guys understand I was able to get all of this stuff for under twenty seven hundred dollars we're talking all the enclosure mats foam pieces underneath projector mounts HDMI cables all that stuff under twenty seven hundred dollars all right like I said I'll put the links in the description everything but so what I did here is I went on eBay and I found an Optoma GT1080HDR 400 bucks it has a 0.5 throw ratio which is easy to fit on a screen like this all right if you have that 10 by 10 by 10 you can almost fill up the whole thing and just so you know when you're using a pc and an NVIDIA control panel you could actually take this right here and stretch it if you wanted to and almost fill it up so there are options for that too but this is a plug and play situation I wanted to show you today the easy hey I'm gonna do it first time you know type situation so what I have going on here is this is a two foot extension projector mount I'll put the link in the description and I actually drilled two holes because this is all sturdy metal all right two nicely spaced holes with big bolts and washers sturdily mounted up there and uh you know you'll be able to see how I did it in the time lapse actually and look at that it's seven feet from the screen and it's giving me just a nice image for four hundred dollars I mean you can't beat that so let's talk a little bit more about the enclosure because it's obviously such an important part of this build so this whole enclosure piece around the metal poles is one piece that's very important you don't have things coming apart balls getting stuck all over or sneaking through a crack whatever maybe and damaging something all one piece and then it actually everything is built in so it has like this industrial grade velcro where you wrap around and are able to tighten everything and it's super easy and while we have a minute here I'll actually step off to the side and I'll put up a picture of the back of the enclosure which is the genius part so they have this tightening system in the back all right you can see how those straps are there where you can just tighten the screen how you want it now I did it kind of taunt you can see I have most of the wrinkles out but yet when I hit a ball really fast into it the ball drops down which is important to me but the other thing you'll notice is that there's actually a buffer from where actually the back of the poles are all right to where the screen is multiple reasons that's important all right even though they include padding around the screen you'll see me install that in the time lapse but you don't have a ball hitting a pole all right and bouncing back but then also you can put this right up against your wall or whatever it may be and it gives it the play that it needs when a ball hits it alright I just think that's a really really good design all right so that covers most of the enclosure all right uh let's talk about these components before I show you the time lapse really quick so I put foam gym tiles underneath with some putting turf that I found on eBay I think the putting turf was only like 90 bucks I made the guy an offer I can put that link down there and then uh these gym tiles were also I think under a hundred dollars right because you only need so many square feet and you'll see me lay those down in the video and it fits perfectly I have turf screen to hitting that and then it's perfectly level so you know if you were putting a ball all right I mean look how perfect that rolls I mean it's it's really nice for the money and that's the whole goal here is is hey I'm building a home golf simulator on a budget right so that was the whole goal we'll talk about this hitting mat really quick this is also from 24/7 Golf all right I love that it's in a compact space but yet you can fit right in left-handed players easily gives you plenty of room and it's also forgiving all right so not only is it sturdy but it's also forgiving you're not tearing up your elbows and wrists because the thing is is you know you hit a fat shot and uh and there's just no forgiveness at all so all important stuff now let me show you a picture of the setup I'll stand off to the side again so you'll see because we'll be demonstrating with the FlightScope Mevo+ and the skytrak that I actually have a runway set up for the Mevo+ now if you're using it in a simulator environment like E6 Connect that's kind of the first software I figured I would show off because it's included with the FlightScope Mevo+ and a lot in it's the iOS version which we're using today um you want to make sure you have a flat and level surface all right which we have here I've already been putting on it it's been working great and I am actually eight feet unit to ball and then I have a little over nine feet of flight all right so just so you understand the setup that we have so that covers most everything that we need as far as kind of going over the components and everything let's take a look at the time lapse so you guys can check out how I did this home golf simulator build all by myself like I said DIY affordable home golf simulator time lapse let's check it out all right guys so the first thing you want to do is take your foam tiles lay them all out I just kind of take my turf and temporarily lay that out I take all the metal piping set that all up and it just clicks together so for one person to do this it just makes it really simple you can take your enclosure now and drape that over and just use the velcro to tighten everything up which makes it really simple I actually have a few pieces out of place you'll see I adjust those it was pretty simple to do that and then obviously it gets into full size all right then I tighten my straps in the back just temporarily and get everything kind of just a little more secure I grabbed that padding and put it all around the sides and then now I just grab my projector mount and I get that all assembled and then what I actually do is is I grab my drill and I drill two holes into the pipe with large bolts and washers so it's very secure and I get the projector all mounted up the way I wanted to using that center pole I run HDMI and power and then just kind of get my iPad hooked up turn the lights off so I can do a quick projector kind of adjustment with the aspect ratio and keystone and everything so I get it looking decent and then after that we grab a golf club and we take a couple quick shots we use FS Golf first off get things kind of zoomed in and here's Awesome Golf and we were ready to go all right guys I hope you enjoyed that time lapse I feel like it really shows how this is a true affordable DIY home golf simulator you know when you can see it that hey one person put this together and like I said um it was a little over an hour and I did a custom mount uh you know for my projector all right I was drilling holes and everything you know so um I think that now that I've put the enclosure together I could probably do it in about 30 minutes by myself I know where the pieces go and I'm sure you heard me in the time lapse there I actually put a few pieces in the wrong spot at first I had to fix that but it was easy I mean it really was so let's hit a couple shots really quick I have E6 Connect hooked up I have my FlightScope Mevo+ ready to go like I said we're using an iPad today with the HDMI dongle and uh I have a metallic dot on the Mevo+ so we should be good to go other than it's been a long day of doing all of this let's see if I can actually hit a few okay shots that was a little thin to start things off but let's see how it ends up ah not too bad probably didn't spin it the way I'd like to let's see what kind of data we have here 141 carry which is pretty normal backspin 6821 I mean that's okay I'd like to get it higher than that when I'm compressing the ball properly um let's see if we can hit another one for you guys here and I'd like to demonstrate a couple things I I figured that I would show you guys you know the FlightScope Mevo+ in this setup and then I would also show you maybe a couple shots on Awesome Golf and then we'll drop down the skytrak and give you guys a couple shots all right and that way you guys can kind of have a good understanding you can ask any questions you know make sure you comment below let me know what you think any questions that you have I mean I appreciate you guys watching if you haven't had a chance to subscribe please do well that was better but it was a little towards the toe so yeah not terrible I mean you see my little aiming stick there I'll take that I mean for how tired I am putting this thing all together um I'm not complaining too much I got a little more spin out of it not too bad all right so let me go ahead and set up Awesome Golf and uh show you guys that let's go ahead and move over all right guys so we're all set up with Awesome Golf and the reason that I wanted to show this is I've shown it significantly in the channel so if you haven't seen it make sure you check it out but you know this is our affordable DIY home golf simulator well this is affordable software all right it's very affordable software you can use it on an iPad like I am today so if you haven't seen it check it out they have some great stuff for kids I'm actually out at the range this is the approach area very cool for some practice I love all the targets they have I want to touch on something really quick because I don't know if you guys can hear it or not I know my microphone kind of does a pretty good job of you know buffering things down so the one one thing I really like about just this simple setup with HDMI is this Optoma GT1080HDR actually has a built-in speaker a lot of projectors have built-in speakers and I so I'm ready to go I have sound birds are chirping I can hear balls landing um you know it's really cool so let's go ahead and give you a quick demo here of what Awesome Golf looks like and I want to talk a little bit about the screen and where the ball lands because I didn't talk about that much when we were hitting balls with e6 oh that's a pretty decent shot did I get it there though I'll take it I'll take it so I tried to jump on that one a little bit I hit just a little bit behind the ball but look where the ball lands all right sometimes it's even up here um so I really could probably tighten my screen a little bit more you know now that I'm hitting some more balls so uh I'd be interested uh you know to what you guys think because I talk to so many people and they build these screens you know whether they're cheap screens or however they're doing it's like you know uh kind of a homemade system that they're using and I'm watching balls like fly back so we'll hit some drivers in another video as well I just grabbed the nine iron so you guys can kind of just see demonstration um let's see if we can maybe get one just a little bit further here see if I caught all that one oh it's good go go oh the backspin see see how I actually got 7414 a backspin um that was a good shot I mean 145 carry that's actually pretty normal for my uh 9 iron I'm tired right now but hey I'll take the balls that are going pretty straight so last thing I want to do is I want to grab the skytrak unit because that has iOS software that I think it's really important for you guys to see I showed how actually look where that ball ended up that's what I was talking about see how it's only like a foot from the screen and I kind of jumped on that thing you know so uh it's it's very impressive you know everything that I'm seeing so far with the 24/7 Golf you know Simba enclosure kind of what I've done here with the the putting in and the turf and everything I just think it's really cool but let's grab the skytrak unit now because not everybody has the space for the FlightScope Mevo+ so as I I probably showed you guys already and if I haven't I'll throw it up on the screen again so we can talk about this um you know it you don't have to do what I'm doing here so we're using Awesome Golf right now I could have this unit sitting on the ground and then it gives you a selection for your tee height okay so I think that's important just to understand you don't need this little runway that I have if you don't have intentions on playing like the full simulation golf um with the the 12 degrees okay so you'd be actually at what I'm at right now is 17 degrees okay so a few things to talk about there but let's go ahead and jump over to the skytrak unit and give you guys a couple shots all right guys so here we are with the skytrak golf launch monitor I have it turned on set up hooked up to the iPad via wi-fi and I'm actually going to show you guys something all right we talked a lot about the golf enclosure but I want to talk about the mat for a second so I'm going to take my ball I'm going to put it on the dot logo facing the unit like it's supposed to be but I'm going to take my club and I'm going to hit right next to the ball notice the ball doesn't move at all I mean I'm right next to it all right well that's actually very important okay you don't want your SkyTrak unit moving all around so this is a very very sturdy mat but at the same time if I take my finger and put it down inside of here this is past my first knuckle it's actually very very good depth okay of the fibers giving you a forgiveness you know so you're not tearing up your elbows and wrists but you're not using some really tall bristle and hitting fat shots and not knowing it all right you're getting flyers out of there and you shouldn't be because you want to be improving your golf game right so I think that's really important so let's go ahead and hit a few shots down there see if I have the energy left in me to hit a few decent ones for you guys not too bad of a shot I hope I didn't draw it too much a little bit of a draw I'll take that I will take that all day all right set us up for uh it was it was a clean strike I just knew it was gonna have a little bit of a draw to it um I set us up for three shot challenge all right so we'll hit three shots for you guys I'm trying to think anything else that we need to talk about you know when we're talking about this DIY affordable home golf simulator I want you guys to comment below you know let me know what you think any questions that you have well that might be a good example of a fat shot oh man that was really bad how far did that go 120. well there's a good example of taking a fat shot let's see if we can recover there and show you guys what a good shot looks like I think I just kind of gave up on that it shows you I'm just getting tired it's a long day putting all this together by myself there's another good swing that was a perfect example of the fat shot oh I straightened it out a little bit a little too much of a fade on it but that's okay that was perfect I'll take it all day long those are two really good strikes you can see I actually carried them probably about 145 or six or so so um yeah distance was 148 148 oh I'm sorry that was uh because I played a couple times I was messing around a little bit so there you go so a couple other challenges on there so that was actually the highest points 200 points how about that so guys I really hope this has been just an awesome overview of how you can build your own DIY affordable home golf simulator all right and come in at just a unbelievably low budget compared to most setups and gotta understand you can customize it and you can do things in your own way this is just a perfect example and I'm glad that I found things for you guys if you want to use those but make sure you drop a comment below I'd love to hear what anybody else has to say maybe what they used instead of what I used but this all new golf enclosure I think is a game changer I really do I think coming in at a price this low and I'm also going to be able to give you guys that discount code as well I'm very happy with the product like I said look where that ball bounces the ability to set it up by yourself I mean that was a key factor you know that that really took me by surprise when they said hey listen you're gonna put this thing together by yourself and actually I didn't have documentation they're creating documentation because this is brand new but the way that the metal poles just snap together you know the one-piece enclosure system um you know to speed it made it really simple you know so as you guys can see in the time-lapse that I showed you so I definitely want to hear your questions comments throw them down below as always guys I appreciate you guys watching stay tuned for a lot more we'll talk to you soon.
Build the rest of your sim
- Enclosure and screen$250 off at Shop Indoor GolfShop
- Carl's Place enclosure5% off, code sent by emailShopGet the code
- Hitting mat$20 off at Shop Indoor Golf. GSV5OFF is more on a first order over $400Shop
- Projector5% off at Shop Indoor Golf. First-time buyersShop
- Simulator computerSurfThing: $100 off applied automatically, no codeShop
- TouchscreenGSV code for TouchscreenGuruShop
- Complete package$250 off at Shop Indoor Golf. GSV5OFF is more on a first order over $5,000Shop
GSV earns a small commission on these links, at no extra cost to you. Shop Indoor Golf takes one code per order.