Golfers that are looking to improve their golf game or enjoy the sport from the comfort of their homes often turn to building a home golf simulator. With huge advancements in technology, creating a realistic golfing experience indoors has become more accessible and affordable. In this comprehensive guide, we will take you through the step-by-step process of how to build a golf simulator at home.
Step 1: Define Your Space
Before diving into the technical aspects, assess the available space for your simulator. Ideally, choose a room with a high ceiling, preferably 9-10ft in height, and enough space to swing a club freely. Consider factors like lighting, ventilation, and the overall ambiance of the room. I find the ideal space for a center tee location that accommodates a right and left handed golfer is 15′ wide and 20-25ft deep. You can build a setup in much smaller spaces, there are just a lot of restrictions to be aware of so feel free to email me anytime with setup questions.
Step 2: Choose Your Simulator Setup
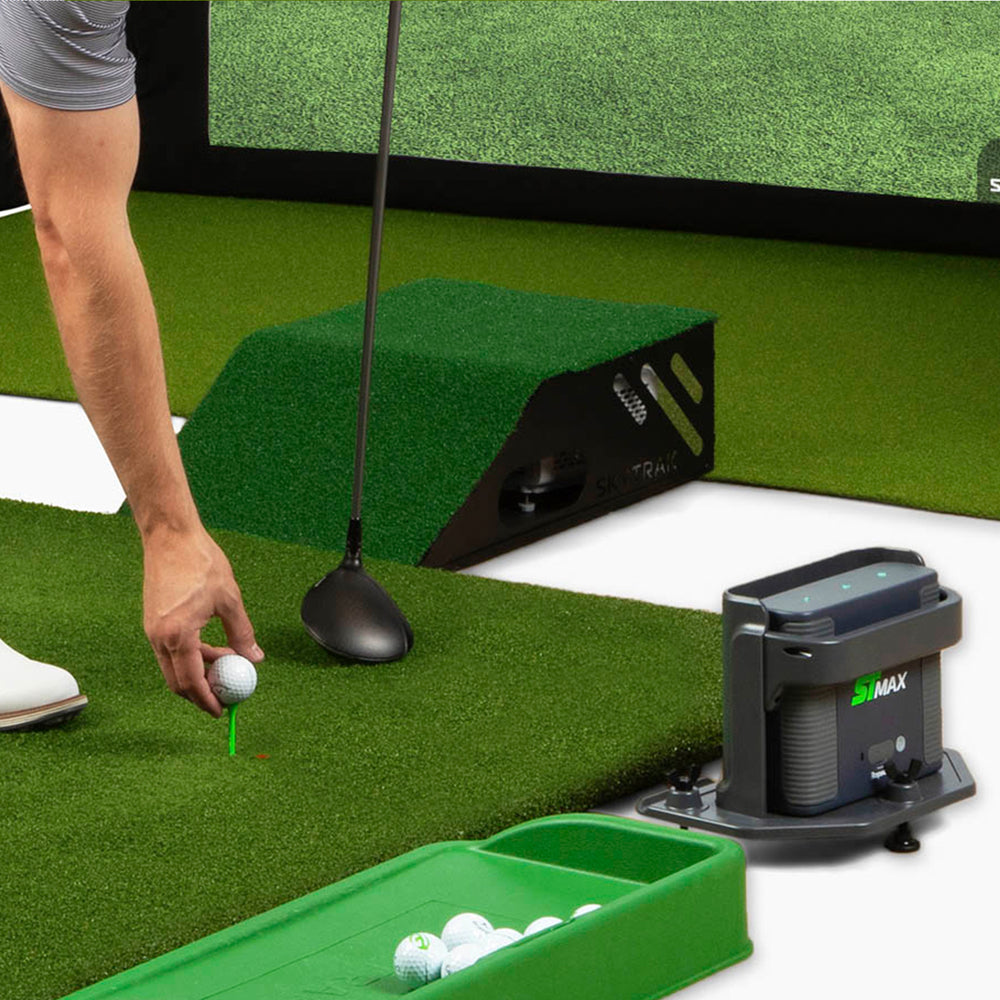
- Launch Monitor:
- The core of any golf simulator is the launch monitor, which measures various aspects of your swing. Popular options include UNEEKOR, SkyTrak, Foresight Sports GC3, Flightscope Mevo+, Rapsodo MLM2Pro, Trackman iO, and more. Choose a model that suits your budget and performance expectations. Once again, I can walk you through the details of all these options, prices, features, and more anytime via email.
- Golf Simulator Software:
- Pair your launch monitor with golf simulation software. Many launch monitors will come with golf simulator software but there are also many options to add-on additional software like the latest GSPRO, TruGolf Apex, TGC 2019, and more. Watch my video coverage on each option to find the one that aligns with your preferences for graphics, course selection, and customization.
Step 3: Build a Hitting Mat
- Base Material:
- Start with a high-quality base material for your hitting mat. Commercial options are available, or you can build your own using artificial turf and foam padding. I do have discounts on several of the leading brands like SIGPRO, Soft Strike, etc.
- Tee Setup:
- Incorporate a tee setup into your mat to simulate different shots. Some simulators come with adjustable tee heights, but you can also customize your mat accordingly. I actually just prefer to use a 3D printed tee that you can place anywhere in your hitting area, it keeps it clean and you will have various tee lengths available as well.
- Turf:
- You may choose to lay turf to fill from the hitting mat to your screen. This will provide a very nice aesthetic but also allow you for a seamless putting experience if you have them level and a tight seam together. You can raise the turf height easily to match the hitting mat using foam gym tiles or carpet padding.
Step 4: Screen and Enclosure
- Projection Screen:
- Choose a high-quality impact screen that can withstand repeated hits. The screen size will depend on your available space and budget. The most popular format sizing for an immersive golf experience is 4:3 or 16:10. These give you the maximum height for your width so you can hit higher shots with wedges as well. I can show you enclosure options that are stand alone or built in screen options to choose from.
- Enclosure:
- Build a frame or enclosure to support the screen and protect surrounding areas from stray shots. PVC pipe or metal framing can be used for a DIY enclosure. Many DIY Golf Simulator Enclosure kits are available and come with everything you need like poles, bungees, etc. Check out my SIG10 Golf Enclosure build for a good example.
Step 5: Projector and Mounting
- Projector:
- Select a projector with sufficient brightness and resolution for clear visuals. Ceiling-mounted or short-throw projectors work well in confined spaces. The higher the lumens the better in my opinion and you can even opt for 4k resolution. Just be sure the projector has the right throw and supports the format of your screen. I can show you how to find this out easily using a throw calculator.
- Mounting System:
- Install a sturdy mounting system for the projector, ensuring it aligns properly with the hitting screen. Adjustable mounts offer flexibility including drop downs for higher ceilings. There are even floor mount options if you have a verytall ceiling.
Step 6: Audio-Visual Setup
- Audio System:
- Enhance the simulator experience with a quality sound system. This could be a set of speakers on the side or even placed safely behind the screen!
- Lighting:
- Optimize the lighting in your simulator room to reduce glare on the screen and create a comfortable environment. You will want a narrow beam light over the hitting area that does not wash out the image of your screen. Also, flicker free lighting is important if you plan on doing any slow motion video.
Step 7: Calibration and Testing
- Calibrate Your System:
- Follow the manufacturer’s guidelines to calibrate your launch monitor and simulator software. This ensures accurate data readings and a realistic golfing experience. Some radar units require no loud noises or heavy steel, and some camera units will need to be calibrated very carefully to give the best results. Take your time on this step as it is a key final item to get you the best data from your new setup.
- Testing and Adjustments:
- Spend time hitting shots and fine-tune your simulator settings. Adjust elevation in the software if your local area is above sea level, set your aim line offset if you do not have a center tee, and adjust stimp to match your turf roll if you choose to.
Step 8: Enjoy Your Home Golf Simulator
Once your home golf simulator is set up and calibrated, you’re ready to enjoy a round of golf without leaving your home. Regularly update your software and stay informed about new features and courses to keep your simulator experience fresh and exciting. Subscribe to the Golf Simulator Videos YouTube Channel for the best ongoing coverage of golf simulator hardware and software.
Conclusion:
Building a home golf simulator is a rewarding project for golf enthusiasts who want to improve their game or simply enjoy golfing in any weather. By carefully selecting the right components and following these step-by-step instructions, you can create a realistic and immersive golfing experience within the confines of your own home. Whether you’re practicing your swing or playing virtual rounds with friends, a home golf simulator adds a new dimension to your love for the game. You can ever throw down some bean bags and have movie night on the big screen!