The full guide: Best golf simulator projectors
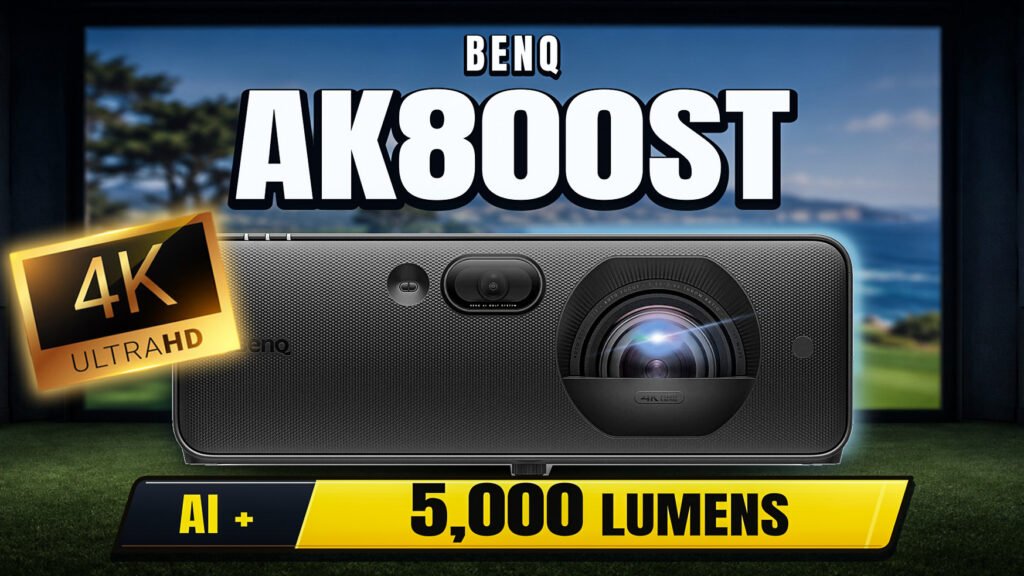
The BenQ AK800ST is BenQ's new middle model for golf simulators: a 4K laser projector with 5,000 ANSI lumens, Golf Mode 2.0 with AI picture processing, Auto Screen Fit 2.0 and the AK700ST's 0.69 to 0.83 lens. It lists at $3,999, $1,100 more than the AK700ST and $2,000 less than the AK900ST. Jay Lasco, host of Golf Simulator Videos, unboxed it, hung it in the AK700ST's spot in his own simulator, and ran Pureplay and Trackman iO on it in November 2026, to see what the extra $1,100 gets an AK700ST owner. The video is at the top of this page, and what GSV found is below.
Shop Indoor Golf sells the AK800ST, and GSV5OFF takes 5% off a first order there:
5% off at Shop Indoor Golf
First-time buyers only, one use. Not valid on a standalone Trackman, the Square Golf launch monitor or the ProTee VX.
Buying through GSV's links and codes helps support the channel: GSV earns a small commission at no extra cost to you, and you still get every saving available. Code last checked October 9, 2026.
See the AK800ST in your room Check the throw for your room
- 5,000ANSI lumens, 1,000 more than the AK700ST
- $3,999BenQ's list price, $1,100 over the AK700ST
- 18.1 msInput lag at 4K 60 Hz, the AK900ST's figure
- 0.69 to 0.83Throw ratio, the same as the AK700ST
BenQ AK800ST specs
| Spec | BenQ AK800ST |
|---|---|
| Brightness | 5,000 ANSI lumens |
| Resolution | 4K UHD, 3840 x 2160 |
| Technology | DLP, laser light source in a sealed IP5X engine, rated for 24/7 use |
| Color | 97% Rec. 709, 30-bit (1.07 billion colors) |
| Contrast | 3,000,000:1 |
| Laser life | 20,000 hours, 30,000 in Eco |
| Throw ratio and zoom | 0.69 to 0.83, 1.2x powered zoom |
| Lens shift | None. Fixed 102.5% offset |
| Keystone | 3D: 30 degrees vertical, horizontal and rotation, plus corner fitting |
| Input lag | 18.1 ms at 4K 60 Hz, 18.6 ms at 1080p 60 Hz, 9.7 ms at 1080p 120 Hz, 4.8 ms at 1080p 240 Hz |
| Inputs | 3 HDMI 2.1 (one with eARC), 2 USB-A (one 3.0 with 3 A of power and a media reader, one 2.0 with 1.5 A), LAN, RS232, 3D sync out, 1/8 in audio out |
| Speaker | 10 W |
| Fan noise | 34 dB, 29 dB in Eco |
| Power | 285 W typical |
| Size and weight | 15.3 x 5.5 x 11.9 in, 13.0 lb |
| Picture shapes | 16:9 native. Screen Fill for 16:10, 3:2, 4:3, 5:4 and 1:1 |
| Price | $3,999, BenQ's list price |
BenQ's figures, from its AK800ST product and specification pages, read November 7, 2026. GSV did not measure the brightness or the input lag.
BenQ's AK800ST page also lists the features around the camera on the front: Auto Golf Screen Fit 2.0, which fits the picture to flat and curved screens on its own when the projector is under 13.1 ft from the screen, Smart Warping with a mouse for anything further or harder, an Ambient Light Enhancer that adjusts color to the light in the room, auto focus, and Scene Memory with five saved setups.
BenQ AK800ST vs AK700ST
From the outside, the AK800ST is an AK700ST grown a few inches longer and wider, and about 5 1/2 lb heavier. Inside, it brings the AK900ST's brightness class, color, input lag and AI processing down to the AK700ST's lens.
| Spec | AK700ST | AK800ST |
|---|---|---|
| List price | $2,899 | $3,999 |
| Brightness | 4,000 ANSI lumens | 5,000 ANSI lumens |
| Throw ratio and zoom | 0.69 to 0.83, 1.2x | 0.69 to 0.83, 1.2x |
| Rec. 709 | 95% | 97% |
| Input lag, 4K 60 Hz | 33.4 ms | 18.1 ms |
| HDMI | 2 HDMI 2.0b, plus USB-C with DisplayPort | 3 HDMI 2.1 |
| Picture processing | Golf mode | Golf Mode 2.0 with AI processing |
| Screen Fill shapes | 16:9, 16:10, 4:3, 1:1 | 16:9, 16:10, 3:2, 4:3, 5:4, 1:1 |
| Size | 11.9 x 4.4 x 9.2 in | 15.3 x 5.5 x 11.9 in |
| Weight | 7.5 lb | 13.0 lb |
| Fan noise | 32 dB, 29 dB in Eco | 34 dB, 29 dB in Eco |
BenQ's specification pages for each, read November 7, 2026. Neither has lens shift: both list the same fixed 102.5% offset.
- A straight swap. The same throw ratio and offset mean the AK800ST hangs where an AK700ST hangs. Jay put it in his AK700ST's spot, and the swap took a few minutes.
- The price step. Jay's rule of thumb from the market for projectors with true lumen figures like BenQ's is about $1,000 for every 1,000 lumens, and the AK800ST's $1,100 over the AK700ST sits right on it, before the other upgrades.
- Input lag. BenQ publishes 33.4 ms for the AK700ST at 4K 60 Hz and 18.1 ms for the AK800ST, the same as the AK900ST. Golf does not need it, but for games on the simulator screen (Jay's kids play Mario Kart on his) it is a real gain.
GSV's BenQ AK700ST review has the AK700ST in GSPro and Trackman.
BenQ AK800ST vs AK900ST
| Spec | AK800ST | AK900ST |
|---|---|---|
| List price | $3,999 | $5,999 |
| Brightness | 5,000 ANSI lumens | 6,000 ANSI lumens |
| Throw ratio and zoom | 0.69 to 0.83, 1.2x | 0.81 to 0.89, 1.1x |
| Lens shift | None | 60% up or down, 23% left or right |
| Rec. 709 and input lag | 97%, 18.1 ms at 4K 60 Hz | 97%, 18.1 ms at 4K 60 Hz |
| Speaker | 10 W | 10 W speaker and 10 W woofer |
| Weight | 13.0 lb | 22.5 lb |
- Where each hangs. The AK800ST's shorter throw puts it about over the ball in a typical room. The AK900ST hangs further back: Jay runs it, and the LK936ST before it, in freestanding enclosures from about 15 ft back, filling a screen 10 ft tall and 15 ft wide.
- Lens shift. The AK900ST's optical lens shift moves the picture without touching its sharpness, which matters for a projector that cannot hang on the center line. The AK800ST has no lens shift, so an off-center mount is squared up with corner fitting. Every digital adjustment risks softening the picture a little, so a projector hung in its ideal spot gives its best picture.
- The same picture tools. Golf Mode 2.0, the AI settings, 97% Rec. 709 and the 18.1 ms input lag are the same on both.
The AK900ST is in GSV's BenQ AK900ST review, and both were first shown in the AK800ST and AK900ST first look from BenQ's launch.
The install and the throw distance
Jay hung the AK800ST from the ceiling mount his AK700ST was on, off to one side of the center of the screen, on a fresh impact screen about 8 ft tall and 12 ft wide with a 16:10 picture. In the box are the projector, a quick start guide, a heavy power cable and BenQ's remote. It needs only an HDMI cable and power.
With a tee about 10 ft from the screen, the AK800ST hangs about over the golf ball. To fill an 8 ft tall screen it throws a 16:9 frame about 14 ft 3 in wide, so the lens goes 9 ft 10 in to 11 ft 10 in from the screen. These are the distances for a 16:9 picture:
| Picture width (16:9) | AK800ST, lens to screen |
|---|---|
| 10 ft | 6 ft 11 in to 8 ft 4 in |
| 12 ft | 8 ft 3 in to 10 ft 0 in |
| 14 ft | 9 ft 8 in to 11 ft 7 in |
| 16 ft | 11 ft 0 in to 13 ft 3 in |
Throw ratio times picture width, the way the projector calculator and the GSV Sim Builder work it out. The Sim Builder places the AK800ST in your room with the screen, the launch monitor and the golfer, and checks the fit.
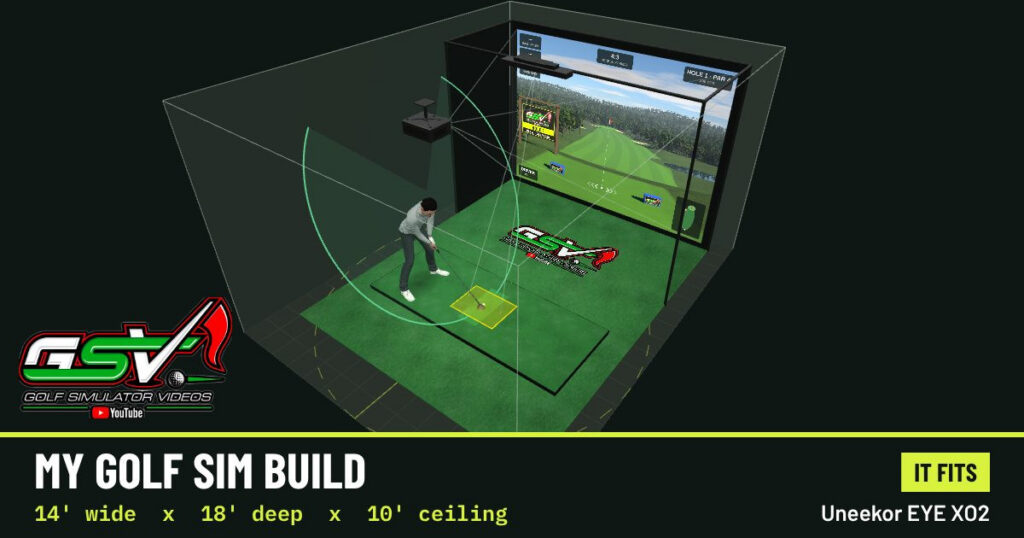
How to set up the AK800ST
Auto Screen Fit 2.0 can fit the picture with the camera. Jay's screen has a corner the frame blocks and padding that sticks out at the bottom, the kind of screen where auto fit may not land perfectly, and he prefers to set up by hand anyway:
- Screen Fill. In the menu, turn Auto Change off and set Screen Fill to the screen's shape, 16:10 here. That matters when the PC sends a 16:9 monitor picture to a 16:10 screen.
- Focus and zoom. Set focus and zoom to manual, then use the powered zoom to size the picture just past the edges of the screen.
- Corner fitting. Move each corner onto the edge of the screen. Jay fills every bit of the screen he can, where some owners leave a little bleed past the edges.
- Focus. Check it last. The auto focus had it so close that Jay barely touched it.
- Power on with the PC. Under Operation Settings, turn on Power On by Signal, and the projector turns on when the PC wakes, with no remote needed.
The AK800ST hangs off center in Jay's room, and with no lens shift that meant a lot of corner fitting. Even so, the corners came out sharp, sharper than his AK700ST's, which showed a touch of softness in the corners after the same correction.
Golf mode and the AI settings
Start in the Golf picture mode, which BenQ tunes to course colors. Under it, AI Golf holds the AI settings. Out of the box Jay found the contrast enhancer on middle. What he saw with each:
- Contrast enhancer. Higher looks sharper, but starts to blow out the highlights a little. Jay found low enough, since the picture is sharp already.
- Resolution enhancer. Its clearest effect is on small highlights: turned on, it takes the bright edge off single blades of grass. Jay left it on low, which kept a little contrast in the trees.
- AI noise reduction. Off out of the box. It reads as more sharpening, and with no noise in the picture Jay saw no need for it.
- AI PQ enhancer. The one for vivid color: greens go far more saturated than on the PC monitor, a lush look like a tour course in spring. It fades in over a second or two.
All of these are a matter of taste, and the same settings are on the AK900ST. The brightness can come down after, if the sharper settings leave the picture brighter than you want.
In Pureplay and Trackman iO
Jay ran the AK800ST from a PC with an RTX 5090, with Pureplay on its maximum settings at 60 frames a second, filmed on a current iPhone in 4K.
- Pureplay, in its early release. Flyovers moved smoothly at Silvertip, close-up pine trees showed the bark, and bunkers held contrast at their edges. On a second course, the 3D grass and the green stood out crisp, with the building behind it.
- Trackman iO, at Pebble Beach. The iO ran its auto alignment when it powered up. In a bunker the sand showed fine detail with shadows across it, and the 5,000 lumens stood out more than Jay expected. On the 7th and 18th, moving the time of day toward sunset brought in long shadows, gold light on the sand and rich greens in the shadows: the color range 97% Rec. 709 is for.
Two of Jay's notes from filming: the phone showed Pebble Beach's water a little purple where it looks blue in the room, and a camera never shows quite what the eye sees. For slow motion swing cameras on a DLP projector, a shutter speed that matches the refresh rate, such as 1/120 of a second at 60 Hz, keeps the color wheel effect away. More on that is in the AK900ST review.
A dark room still matters most for contrast. A projector cannot make black on a gray screen: the darkest it shows is the screen with its light off there. So keep light off the screen, and the AK800ST's brightness does the rest. It is bright enough that Jay could turn it down a step.
More on the software: GSV's Pureplay guide, with its price, Early Access and the PC it needs for 4K, and the Pureplay first look.
Should AK700ST owners upgrade to the AK800ST?
Jay's position is that it is not his money to spend, so he showed what changes. What he saw in the swap:
- A difference you notice. The extra 1,000 lumens stood out more than he expected, with more contrast in Pureplay and Trackman.
- Sharper corners after heavy corner fitting.
- The AI settings, Golf Mode 2.0 and 97% Rec. 709.
- About half the input lag for games.
- Nothing to move. The same mount spot.
An AK700ST is not short of anything for many rooms, either. Jay knows commercial bays running AK700STs in rooms without much light, where it fits and works well. The flagship, or a step up at all, depends on the room's light, the screen size and the picture you want.
BenQ AK800ST pros and cons
Pros
- 5,000 ANSI lumens, 1,000 more than the AK700ST, and the difference showed in Pureplay and Trackman.
- The AK700ST's throw and offset, so it hangs in an AK700ST's spot.
- Golf Mode 2.0 with AI processing and 97% Rec. 709.
- 18.1 ms of input lag at 4K 60 Hz, about half the AK700ST's.
- Auto Golf Screen Fit 2.0 for flat and curved screens.
Cons
- No lens shift: an off-center mount is squared up with corner fitting.
- $1,100 more than the AK700ST at list.
- Bigger and heavier than the AK700ST: 13.0 lb against 7.5 lb.
- Auto Golf Screen Fit 2.0 works on its own only under 13.1 ft from the screen.
- A short throw that hangs about over the ball, so a mount well behind the tee calls for the AK900ST.
Who the BenQ AK800ST fits
- It fits a room where the projector hangs about over the golfer, with a tee about 10 ft from the screen.
- It fits an AK700ST owner who wants more brightness and the AI settings without moving the mount.
- It fits a room with some light in it, or a bigger screen, where 1,000 more lumens than the AK700ST shows.
- It fits a simulator that doubles for games, with 18.1 ms of input lag at 4K.
- Look at the AK900ST instead if the projector hangs well behind the tee or off the center line, where lens shift helps, or for 6,000 lumens on a very big screen.
- Look at the LK830ST if the projector has to sit ahead of the golfer, on the floor or a short mount.
Every model's throw and price is in the golf simulator projector guide.
Where to buy the BenQ AK800ST, and codes
Shop Indoor Golf sells the AK800ST. GSV5OFF takes 5% off a first order there:
5% off at Shop Indoor Golf
First-time buyers only, one use. Not valid on a standalone Trackman, the Square Golf launch monitor or the ProTee VX.
Code last checked October 9, 2026.
As of November 7, 2026, Shop Indoor Golf had no Black Friday offer on the AK800ST. Building a whole simulator? Carl's Place's Black Friday sale is 20% off its simulator bundles through November 30, with GSV's GSVSIMSZN on top. Every offer is on GSV's golf simulator Black Friday deals page, and every GSV code is on the golf simulator discount codes page.
More BenQ projectors on GSV
- BenQ AK900ST review: 6,000 lumens, lens shift and the AI settings
- BenQ AK800ST and AK900ST first look, from BenQ's launch
- BenQ AK700ST review
- BenQ LK830ST review, for a projector ahead of the golfer
- BenQ AH500ST review, for floor mounts
- The best golf simulator projectors
Free consultation with GSV's partner builders
Planning a simulator around a projector like the AK800ST? Jay works with official partners: master builders he hand-picked, who get on a call quickly and make sure the projector, the throw, the screen and the room fit before you buy. They offer package deals on the whole build, DIY packages, full installation, and more. The consultation is free.
Build the rest of your simulator
- Golf simulator enclosures and screens$250 off at Shop Indoor Golf with code GSV250.SIG8, SIG10 and SIG12 enclosures and studios, DIY and commercial enclosures, G-TRAK screens, SIGPRO flooring and complete simulator packages.
- Carl's Place enclosures and screens5% off at Carl's Place. GSV emails you the code.
- Golf hitting mats$20 off at Shop Indoor Golf with code GSVMAT. On a first order over $400, GSV5OFF takes more: 5% off.SIGPRO Softy, Super Softy, Softy Lite and Commercial Teeline mats.
BenQ AK800ST questions
How bright is the BenQ AK800ST?
5,000 ANSI lumens, BenQ's figure: 1,000 more than the AK700ST's 4,000 and 1,000 less than the AK900ST's 6,000. In Jay's simulator the extra brightness over the AK700ST stood out more than he expected.
How much is the BenQ AK800ST?
$3,999, BenQ's list price. That is $1,100 more than the AK700ST at $2,899 and $2,000 less than the AK900ST at $5,999. Shop Indoor Golf sells it, and GSV5OFF takes 5% off a first order there.
What is the difference between the BenQ AK800ST and AK700ST?
The AK800ST has 5,000 ANSI lumens against 4,000, 97% Rec. 709 against 95%, 18.1 ms of input lag at 4K 60 Hz against 33.4 ms, three HDMI 2.1 inputs, and Golf Mode 2.0 with AI processing. Both have the same 0.69 to 0.83 throw ratio and 1.2x zoom. The AK800ST is bigger, at 13.0 lb against 7.5 lb.
Can the BenQ AK800ST replace an AK700ST on the same mount?
Yes. BenQ lists the same 0.69 to 0.83 throw ratio, 1.2x zoom and 102.5% offset for both, so the AK800ST hangs in the AK700ST's spot. Jay swapped his in a few minutes.
Does the BenQ AK800ST have lens shift?
No. The AK800ST has a fixed 102.5% offset and no optical lens shift. An off-center mount is squared up with corner fitting, which Jay used a lot of, and the corners still came out sharp. The AK900ST is the BenQ with lens shift.
How far from the screen does the BenQ AK800ST go?
Its throw ratio is 0.69 to 0.83. For a 12 ft wide 16:9 picture it hangs 8 ft 3 in to 10 ft from the screen. To fill an 8 ft tall screen it hangs 9 ft 10 in to 11 ft 10 in, about over the ball of a tee 10 ft from the screen.
What is the input lag of the BenQ AK800ST?
18.1 ms at 4K 60 Hz, the same as the AK900ST, against 33.4 ms for the AK700ST. At 1080p it is 9.7 ms at 120 Hz and 4.8 ms at 240 Hz. These are BenQ's figures.
Which AI settings did Jay use on the BenQ AK800ST?
The Golf picture mode, with the contrast enhancer and the resolution enhancer on low and AI noise reduction off. The AI PQ enhancer makes greens far more vivid, for anyone who likes that look. All of them are a matter of taste.
Does the BenQ AK800ST work with a curved screen?
Yes. BenQ says Auto Golf Screen Fit 2.0 uses the camera on the front to fit the picture to flat and curved screens when the projector is under 13.1 ft from the screen. Beyond that, Smart Warping with a mouse does it by hand.
Is there free help planning a simulator with the AK800ST?
Yes. GSV's partner builders, master builders Jay hand-picked, offer a free consultation: they check that the projector, the throw, the screen and the room fit, and offer package deals, DIY packages and full installation.
More from GSV
Full video transcript
Today we're going to review the BenQ AK800ST. Is this the new 4K golf simulator projector sweet spot, and is it worth another $1,100 over the AK700ST? That's been such a successful model. Or what about another $2,000 versus the projector that we just covered the new flagship, AK900ST? Well, let's do a full unboxing. Talk about the specs, get it installed, and show you what it looks like in action. So yes, this is actually similar to the AK700ST. If you guys haven't seen that video that I've done in the channel, I would suggest checking it out. And if you haven't seen the new AK900ST review that we did, I'd check that out as well. That thing is a beast. But I want to talk about today what this new AK800ST is bringing to the table. We're going to talk about the sizing, the specs, all kinds of different things that I think are really important for you guys to consider. So first of all, well packaged with foam, nothing to worry about right out of the gate. I'm just going to tell you guys, I can tell it's bigger and I can tell it's heavier than the AK700ST. And I already kind of looked up those specs so I knew it. It's about 5 pounds and it's kind of like a few inches each way. And I'll show you what that looks like. Not so much the thickness, but length and width. You definitely gained some footprint over the AK700ST. Still overall kind of a compact projector in my opinion. That's packing a lot more lumens. A thousand more lumens than the AK700ST. But I think it's very important to understand, like is it worth the money if you have an AK700ST to upgrade to this, do you need it and what is he going to get you? So first let's look at the unit. Then we'll talk about some specs. So let's bring it up to the camera just to kind of show you guys this design. So smaller footprint like I said especially versus the AK900ST. It has the AI BenQ camera. All right. That sensitivity is going to give it the new 2.0 fitting technology. And then also that new AI processing that it has built in as well. We'll talk more about that in just a second. So you still have your fans on the side. You still have all your standard ports as far as HDMI and then that USB, which is nice because it's a 15. What if you need power for some reason that RS232 your sync out and LAN ports. So overall pretty standard on the side power menu okay buttons back and source. Now one thing looking at the front of this that I want to point out right away, looking at the lens. This does not have optical lens shift like the AK900ST has. So it is also a different throw ratio. It's actually the exact same throw ratio as the AK700ST. So if you're looking to just do a swap it would be a very easy swap. But the AK900ST has a lot of adjustability as far as where you can mount it versus this being in a shorter throw ratio, I actually find it's really nice. So if you're hitting about ten feet to the screen, you have more of like a standard size, like I have eight feet tall, ten feet wide. Just to kind of give you. I'm sorry, eight feet tall and then 12ft wide. That's 16 by ten roughly. You can mount it pretty much over the golf ball, which is really nice. So let's compare a couple things really quick and then we'll dive more in. So the AK700ST had an MSRP of $2,899. This one's coming in at $3,999. That's where I mentioned that $1,100. Now generally in the space when you look at projectors and lumens, especially when you're talking about the quality of BenQ, because they really give a real nice true lumen, that brightness is about $1,000 for every 1000 lumens. So with this one, you're stepping up from 4000 to 5000. That kind of justifies where I'm seeing that price. But it comes with more features than just that. And that's what's cool. Now, the AK900ST that I showed in the previous video, I'll put those links down below as well. That was $5,999. Talk about a flagship. That's an investment, but it really depends on if you need it or not. I mean, I know people running the AK700ST and commercial environments. They don't have a very bright space and it fits really well and works for them. So it's not that you always need the flagship. It really depends on what you're trying to do with it, the quality you're going for, especially that ambient light. When we're talking about lumens now, this has the new AI Golf Mode 2.0. So you are going to have the different modes with AI adjustments where it can fine tune grass and water in colors over the AK700ST. And I'm going to demonstrate that for you guys here in just a second. We did the same thing with the AK900ST. It's pretty cool. I mean, depending on the level of sharpness and colors that you like, there's a lot of adjustability in there. And it also has a higher Rec. 709 coverage. So the Rec 709 goes from 95% to actually 97% in the AK800ST, and that matches the AK900ST's Rec 709 coverage throw ratios. Like I said, the exact same 0.69 to 0.83 and the AK900ST comes in at 0.81 to 0.89. Now, those we've used between the LK936ST and the AK900ST that I showed, we actually a lot of times have these, you know, more if you want to call it freestanding enclosures that we do. And it's like 15ft back and it fills up a massive ten foot tall, 15ft wide screen. So it's pretty cool adjustability and that, that brightness on that huge image and everything. So it depends on kind of your size and your ambient lighting and everything. If you really need to go to that now optical lens shift I talked about that AK900ST has massive 60 plus minus vertical and 23 plus minus horizontal. This does not have lens shift, but it does have some massive adjustability in corner fitting. You just have to understand that the more digital adjustments that you make, you risk softening that image a little bit. So I'm not saying that you might not be overall super happy with it if you had to use a bunch of adjustability, but you could risk having some softening in some corners and things. So I just always want to be transparent and let you guys understand that if you're mounting a projector in the most ideal spot based on its throw ratio and adjustability functions especially like lens shift and things, that's going to give you the best performance overall. All right, here's an interesting one that I found. The published lag on the AK700ST was 33.4 milliseconds. I mean, that's really fast, right? But the AK800ST is actually 18.1 matching that of the AK900ST. So if you like to use your golf simulator for gaming, my kids love it. We throw up Mario Kart, throw some beanbags down. It's an incredible time depending on what type of games you play. If that input lag is really important to you. This has the same input lag as the AK900ST flagship, so pretty cool to share that. Other than that, I feel like that covers everything that we need to do. As far as like the unboxing and everything goes, I will show you guys real quick, basic things that are included in the box, same as I've always shown. Quick start guide documentation, nice thick quality power cable and then the BenQ remote. All right, so what I'd like to do now without further delay is get this installed. I'm putting it exactly. Basically where the AK700ST is. Simple swap. This should only take a few minutes. Let's go. Oh my gosh, we have the BenQ AK800ST installed. One thing I want to point out, you guys might not have noticed this is a brand new screen. So we're going to show this thing in its finest. And let me tell you, it is shining bright, sharp. I want to talk about installation though to start off. And then we'll dig into some different software. We'll show you guys some different things. So as far as setup goes, I have a unique scenario. If you look in the upper right of my screen, see how it's kind of blocking the corners. And then I even have my padding that sticks out a little bit, you know, on the bottom. So auto fit might not work perfect for you. But what I want to point out, and I think it's so important, I actually prefer just manually setting up and just fine tuning exactly the way I want. So if I go to menu, the very first thing in my opinion you need to do is when you're doing something like I do, I duplicate from a 16 by nine monitor to a 16 by ten screen. So if you go under screen fill, there's two things that I like to do right away. Turn this auto change feature off and then screen fill 16 by ten. So that is going to convert the image to 16 by ten to screen fill to your projector. Once you do that you go under focus and zoom manual focus and zoom. I use the power zoom to zoom it in to basically fit on my screen, like just over the edges. And then I use the corner fitting right here, and I just fine tune the edges exactly where I want them, and you can even see how it kind of gets cuts off, you know, just a tiny bit. I always want my image going every single possible millimeter of coverage I can. That's the way I prefer it. Everyone does a little different. Sometimes I see people with some bleed on the edge. They just, you know, they want to make sure every single thing is fitting on the screen. Just depends what your preference is. But between doing that, I barely adjust the focus. I mean, I don't understand how it auto focused so well. Usually I always do a couple clicks on my own. The first thing that I've noticed, and I'll bring the camera up to the screen right away, is that the focus is insane. So I used a bunch of corner fitting because the projector is actually off set from the center, so I don't have that digital lens shift. That means you have to use correction. Well, I'm going to purposely take you to these corners and show you that. Holy moly are they sharp. I mean it is an improvement. The AK700ST, don't get me wrong, was great, but did I get just a tiny bit of softness in the corners because of all the corner fitting that I did? Yes, yes, yes I did, just a little bit. I mean, was it really noticeable to the average person? Maybe not, but when I swap these out. Whoa. And there's something about probably the lumens that's making the image just crazy sharp. And what I want to do is we'll just right out of the gate, and I'll even probably bring the camera up closer so you guys can actually get an idea of what the AI enhancement looks like when I change it. So let me just make sure that this is kind of straight for you. I love doing these videos live as I live as I can. We're just in cameras if they're level or not and on the fly, because I just don't want it to be too crooked for you guys. That should be perfect though. So let's go into menu. All right. Whoops. Hit it twice and let's go to picture. So first thing you want to do is be in golf mode in my opinion I mean they have they have fine tuned this to the colors and everything that you should see on the golf course. All right. Now once you do that you're going to want to go to AI golf. And this is going to be defaulted on. They're going to have the contrast enhancer I think on middle. And they're going to have both of these off. So let's go ahead and put it back to off and off. One more. There we go. And now we'll kind of do just one at a time. So let's just do a contrast enhancer from high. And then let's go down to low. The first thing I notice when I switch those is and I'll even do off that things are getting sharper. But be careful because as you get sharper, you actually get just a tiny bit of almost blowouts on your highlights, I've noticed. So I almost feel like it's it's so good already. Lows enough. I've been messing with this even on the AK900ST. So this is going to be a preference thing you guys are going to have to do on your own, whatever your eyes like whatever your preferences. So let's go to AI Enhancer low and then let's go to medium or middle and let's go to high. So this is the resolution enhancer. And this is one that I don't see a ton of difference on. And we'll have to kind of pay attention to like bunkers and grass as we get super close. But that resolution enhancer you're already a laser light source. And I didn't talk a lot about that in the box unboxing because I've talked about a lot in the past. But you know, BenQ's laser, that sealed unit, it's incredible. I mean, massive thousands and thousands of hours. The sealed unit that doesn't require filters or anything. It's so bright that I just don't know how much of that you need, because it's brightening things up. And you could adjust the brightness after, too, so you might want it sharper and then dim it down just a little bit. But let's go to AI noise reduction. I'm just going to kind of go to off and then low and then high to see if I'm. Yeah. So it almost looks like this is another kind of form of just a little bit of sharpening, which I don't know if it's necessary because I don't have a lot of noise on the screen, so they don't have that on by default. I don't think it's necessary. I think they have this on medium, which I can see. It adds just a little contrast to the trees, but it brightens them up a little bit. I just don't know if it's necessary or not. I think I prefer low the resolution enhancer. It's kind of the same thing. This is what I'm noticing that you guys need to see right away between between low and then high on the. Actually it's off and high. So let's take you up right here. And I'm going to point with what I'm seeing a difference on. I think you're going to be able to see it on here. Let me go low high low high. See that. It's right here. Look, look right here how it goes. Dim. Bright dim bright. So the resolution enhancer, when I turn it on, it actually takes the highlight away from that little grass. So that's going to be another preference thing. I think what it's doing is, is it's finding certain highlights. And I mean you can. I'm pretty sure you can see that plain as day on. I'm just going back and forth so you can see it. See that that's off. That's on. Look at that little blade of grass. See how it changes. It's kind of incredible. You can see that on there. So that's going to be something where it makes a difference. But you're going to have to find a preference on what you think works works best for you. I want this to be as close as I can to this screen. I don't want to take too much off the screen for you guys. I also want to make sure that it's at least somewhat level for you. There you go. I think that shows it all pretty good. So I don't know I don't know what I prefer, do I do I like those details kind of being dimmed down or not even the trees when I have it on low they have like almost more contrast to them the way, the way that you get the detail on them. And then when you go to medium and high, there's not a lot there. I think I'm going to leave it on low. I think I like it the way that it gives you just a little bit of contrast. Look how bright that is on my phone. I have it turned down. I turned the exposure down like like 1.3 or 1.7. And it's just it's it's incredible. What else did I want to show you guys inside here? I mean, the only other thing that I've talked about in the past that is pretty cool is if you go under Operations settings, make sure that you have your power on, off signal power on. I love that feature. When I wake up my computer, it automatically turns on the projector. I mean, that's something I pointed out is kind of like a hidden secret a long time ago. That is just that is just a fantastic feature. No, you don't have to touch your remote the whole time. So let's do this. Let's do a quick flyover. Let's go flyover. Watch how smooth this is. Now I'm running a 5090 at the max settings on Pureplay and I can run 60. So you're seeing a smooth image all the way up. You know what's funny is, is I can kind of see a couple lines on my screen. I probably should steam it because it was in a bag for so long. Actually, this is a spare screen that I had. So if you see those little tiny lines on the screen, I can see them just just barely. There's actually fold lines, but I don't know if you guys can see them or not. This is looking really, really good. I mean really, really good. Let's skip around. I want to show some different software to I think that looking at that grass right at the bottom of the screen, you're going to see that you're just getting incredible detail, incredible detail. Look at the clouds, look at the contrast and the colors that are coming out. And I will show you something really quick. Some people prefer like wild color. All right. Let's go to picture. Let's go to AI golf. I showed this in my AK900ST video. The AI PQ enhancer. Watch the colors if you turn this on, if you like vivid colors, this is your setting. And I'll do a flyover with that on. I mean, it really takes like if I look at my screen on my computer versus the projector, it's a whole nother level of saturation and color. I mean, it is it is vivid green. So if you want that lush like masters feel, it can give you that by turning on the AI PQ enhancer. I'll turn that off and then on and I'll turn it off one more time. You can see how much that changes. You can't quite tell the on as much because what it does is it fades it in. All right. Watch them around the tee box and it's not moving. I'm going to turn it off all at once. Ready. Off. And you can see that kind of go away. So I wanted to make sure I pointed that out. So let's get out of here. Show a couple more holes here at Silvertip, which is a cool course. There's some grass over on the left. It should be able to get kind of an idea of some different things. There's some close up pine trees. I think that's very important to show the detail. Look at the detail this is able to produce on these trees. I mean look at that bark. And I know it's on a camera. I mean I'm using an iPhone for that matter recording in 4K though. And this is the latest gen iPhone. So it's not it's not like this is a shabby setup or something like that. But I just want you guys to pay attention to some of the things that I'm seeing, and hopefully you can see them decent on the camera. It's never going to be the same, but I think it really does give a good idea. So let's just take a couple more. Let's look at like 17 and then let's do this really quick. Before I forget, let's move into a bunker because I want you guys just to see kind of some edges. The grass is right there. I can I can see good contrast in the bunker. See the detail. You can see I showed some lighting differences on the Trackman's software, which we can do as well. I went out I think, to Pebble Beach. This is a great example here. Look at all the notice the water. We could actually take a ball and move it down to the water, so you guys can get an idea of what the water looks like. Look at that. Look at that. I mean that's just fantastic. That is fantastic. I mean, things are just starting to get more lifelike. I mean, between the software, between these projectors, I mean, it's just wicked. Everything is getting so good. So let's let's show you one more course. I think it's important to show you one more course. I'm trying to think of one that, you know, you guys would really know and be able to recognize. Probably the black horse out in New York, you know, let's take a look. Let that load up only takes a second. It's not not too bad. Loading loading courses on Pureplay. I feel like the size of the courses are a decent size. Oh yeah. Look at that. Because that has some really good distance to it. And then also the 3D grass. That's really cool. And then what we'll do is there's a couple of them where you kind of get in the trees. I want to say once you get further in. Yeah, further in, let's do a flyover of this because you have all those bunkers and everything. I didn't show Pureplay in my initial AK900ST video, so I figured I'd take some time to show this, especially because the early release is out now. So anytime there's new software, people are all excited, so I figured I'd show a little more. Can I get out of drone mode? Yeah, just clicking drone takes me back. I'll tell you what. That response rate, you know, between how fast that's moving, I mean, just everything looks looks really, really good as far as, like, movement on the projector. Let's go up close to the building, like, there we go. And then let's even go up by maybe on the green is what I'm thinking. Let's move like we're putting or something. Yeah. Because there's the building right there. So now you can see the green. You can see the edges of the grass down there in the lower right, the grass in the back, the building in the back. Look how crisp that is. Holy crisp. That's this. Fantastic. All right. So now this is the point in the video where I have to say, if you have an AK700ST, are you going to want to upgrade? And first of all, I don't want to spend your money for you. Okay. I think it's my job to try to show the different examples, try to point out what you're going to get if you were to upgrade. And that's what I'm trying to do now. Now, can I say that this is a noticeable difference? I think I actually can I want to make sure my video, I can see a little bit of color wheeling going on, and it should actually be set to 100. I think I have it one over 120, so it shouldn't have any color wheeling going on. I just saw a tiny bit. It might have just been out of focus there for a second. Sometimes that happens. Okay, perfect. I don't see any now that color wheeling happens if your shutter speed isn't matching. I've shown that for we will not do an update right now. Let's go to practice actually. And let's go to on-course practice and let's go to Pebble, because I showed that with the 900. I think it's very important to show similar things to and I'll show more eventually. I mean, like, we're just we're just jumping out really quick. All right. There's the O. Actually powered it off on accident. I was messing with some wiring up there, so I apologize for the short delay. I actually had the unit powered off, so we had to power up the iO, which we're good to go. Now you can see it will actually do an auto alignment, which is pretty cool. And then we'll go out here to Pebble Beach and we're going to mess with lighting and stuff. I think that's going to be important, you know, to mess with lighting. We did that previously. You guys can actually get a really good idea right here of just looking at some imagery and looking at the colors, you know, the tints not perfect on the phone. That's the first thing. Like, look, if you look at the water just a tiny bit more like purplish versus blue, which I see in real life. Want to point that out? I just don't want you guys to think that, you know, the color is off on the screen. The color is actually really good. It's just sometimes on camera, unless you were just, you know, color grade a video perfectly, which, you know, it's just I don't know if that's really worth it, but I can potentially do that in the future if that's something we really need to do. But I just want to point out that certain colors sometimes might be just a little off on the hue or tint, but overall, you know, it's pretty darn close. That's the only thing I notice is kind of on that water. Check this out. I mean, between Pureplay and Trackman, looking at both of these, I mean, the first thing that I've noticed is the heavy level of contrast. I mean, this is so bright that thousand lumens is standing out way more than I expected. You know, it's one of those things where it's like, well, it's actually 1100 bucks. Well, the, you know, market justifies $1,000 per 1000 lumens. I mean, it's been that way for a long time. And I have to tell you that it's noticeable. I mean, it's really noticeable on the of my swing camera is popping up. Sorry about that. Let's do this. Let's place a ball up here in this bunker right there. And we will be able to show detail of sand with shadows. So look at the level of detail in that sand. Wow. I mean that is fantastic. I like seeing the shadows right against the sand too, because that gives an opportunity to really look at what it's able to produce. As far as clarity on those highlights, and then the contrast into the shadow on the sand. And I think that that's just a just a perfect example. I mean, just a perfect example. All right. So we'll take a look at just a couple other holes. I think I skipped around to quite a few last time. We'll go out to seven. I'm definitely going to go to 18 and show it like I did. But look at the shadows from the branches. I think that's something to point out. I have to be honest that it's it is so bright that I think I could click it down a little bit. I just want to show it at its best. I mean, a lot of people like it in a bright mode. I mean, it is it is bright. Let's go to famous number seven here because now we'll have water. I can change the lighting a little bit. So you guys have an idea of what the lighting looks like. Especially when we went to 18. I thought that that was just really, really cool. So I want to make sure I think I can do this in here. Change environmental settings, time of day. What kind of cruise over to late, bring in some shadows which will bring in heavy contrast, and you guys will be able to see what that looks like. I'm watching the camera as I'm doing this. Let's go to early to. Yeah. Look at the shadows come in. It does a very good job. Even though a projector can't produce a black because the screen is not black, so it can't take it and turn it into a black. But when it can overcome with its brightness, it's amazing how well the shadows look. And it's just so important to have a dark room, because that's your best opportunity to create that dark color, because it essentially is turning a light off in that area, and that's giving it its best opportunity to have contrast. And that's why you want a dark room. You just want kind of a little, little over lit area. I'll kind of leave this into like a, you know, afternoon ish for now. You want a dark environment so your screen can get dark as needed. And I hope that makes sense. I think it was 18 that we were on where I was just baffled, looking at the sunset and everything. And we'll do that right now. So let's go back to the lighting and bring this all the way down so you guys can see the colors coming in, how it's kind of getting gold, and you can see that the changes. I just think that's so cool. It really does a great job of producing the highlights. And then also at the same time the colors. You know, when that sun's kind of creeping down like that and we'll move the ball around a little bit too because that's what we did last time. So let's go back and let's place a ball. Where were we at? Let's, let's place it over here just to see it. Yeah. See. Because now you're going to see sand too. So now you're going to see the sand detail, the shadows coming over kind of that golden sky, you know, the god rays coming through. And then I'll actually place the ball again. I think I placed it in this bunker last time because that gave a pretty cool opportunity to let's make sure. Yeah. See, the sun's right back there though, so I kind of have to move it just a little bit I think. Was I in this bunker last time? I don't remember. Let's look. Yeah. See that's on the other end. Let's see. Place ball done. There we go. That kind of shows it just a little bit because you're getting kind of that sun coming in. I think that I was back further I was back here. Maybe there it is. That's what I had before I was moving this back here. It wasn't in the bunkers, the thing. But you can see that detail. So if I like move it right here, you're going to kind of see everything. You're going to see the sun. You're going to see a little bit of that bunker detail down there. I think that this highlights how important it is that you have that color rec that 709 percentage, because it's able to produce that, that golden yellow color. And yet look how rich the green is in the shadows. Still in a dark area. So you have a super big highlight in the upper left. And then you have these dark areas that are still able to hit the color ranges of the greens down there in the grass. And that's just something that, you know, you might not pay attention to. Look at the gold. See over in the left over here by the bunker right there. Look at the gold that's showing up in the sand from the sun. And that's just a wide variety of color range that really, really stands out. I mean, that is so cool. I think we can do a full drone preview of this whole, which would be cool to look at because you'll be able to see the water, then be able to see all the buildings, the clouds. I mean, I know I'm really taking this, you know, through its paces, but I think it's important for you guys to see all this. That's a perfect opportunity to see that sunset, the sand. I mean, how unique is that? So this is the BenQ AK800ST. You guys tell me, is it is this the perfect balance in a 4K golf simulator projector? It's not six grand. And yes, it's $1,100 more than the AK700ST, but this is 4K. It's Laser Auto Fit 2.0, the thousand extra lumens, the AI enhancement. It's packing a lot of punch. I mean, it is packing a lot of punch. You let me know what you think in the comments below. And as always, stay tuned. There'll be a lot more coming soon.
Build the rest of your sim
- Enclosure and screen$250 off at Shop Indoor GolfShop
- Carl's Place enclosure5% off, code sent by emailShopGet the code
- Hitting mat$20 off at Shop Indoor Golf. GSV5OFF is more on a first order over $400Shop
- Simulator computerSurfThing: $100 off applied automatically, no codeShop
- TouchscreenGSV code for TouchscreenGuruShop
- Complete package$250 off at Shop Indoor Golf. GSV5OFF is more on a first order over $5,000Shop
GSV earns a small commission on these links, at no extra cost to you. Shop Indoor Golf takes one code per order.