Many golf enthusiasts struggle to practice effectively at home due to limited space or equipment. Creating a DIY golf simulator can address these challenges and help you refine your golf swing using tools like a laser projector and a sturdy pipe for structure. This guide will cover essential equipment choices, setup tips for accurate performance, and effective practice routines. By following these recommendations, you can enhance your skills and enjoy a more engaging golfing experience, turning a bit of space into a dedicated practice zone.
Select the Right Location for Your DIY Golf Simulator
Choosing the right location for a DIY golf simulator is essential for optimal performance. Start by assessing available space to ensure it accommodates necessary equipment, focusing on ceiling height and dimensions for swing freedom. Proper lighting conditions enhance visibility, while evaluating nearby electrical outlets supports equipment needs. Avoid distractions in your chosen spot, and consider flooring options like artificial turf that can withstand impact from equipment and provide a realistic experience.
Assess Available Space for Optimal Simulator Setup
When assessing available space for a DIY indoor golf simulator, it’s vital to check the ceiling height to allow for a full swing without obstruction. A minimum clearance of at least 10 feet is recommended to ensure players can execute their shots comfortably. Additionally, the dimensions of the space should accommodate the setup, considering both the simulator screen and hitting area. It’s also wise to examine the flooring; using a carpet can provide a stable surface that absorbs impact while mimicking the feel of grass, enhancing the overall golfing experience.
Proper lighting is another essential aspect of setting up an effective indoor golf simulator. The recommended brightness is approximately 1500 lumens to ensure clear visibility of the screen and accurate ball tracking. If necessary, installing new drywall can help to create a smoother, clean-looking environment, while strategically placed electrical outlets will support various pieces of equipment. Considering these factors will lead to an optimized and practical simulator area that maximizes enjoyment and performance.
Ensure Proper Lighting Conditions for Clear Visuals
Proper lighting is a critical element in establishing an effective DIY golf simulator setup. It is essential to ensure that the lighting conditions support the simulation and provide clarity for the computer monitor displaying the golf course environment. Aiming for a brightness level of around 1500 lumens can enhance visibility and help players track the golf club, promoting a more engaging experience and better performance during practice sessions.
Furthermore, positioning the lighting correctly eliminates shadows that may distort the player’s perspective. Using adjustable fixtures can help tailor the illumination to the specific needs of the space, ensuring that every swing is captured accurately. Additionally, maintaining a comfortable temperature with proper air conditioning can contribute to a more enjoyable atmosphere, allowing players to focus on improving their skills without distractions from inadequate lighting.
Consider Ceiling Height and Dimensions for Swing Room
When setting up a DIY golf simulator, considering ceiling height and dimensions plays a crucial role in ensuring a comfortable swing space. Ideally, a minimum ceiling height of 10 feet is recommended to prevent interference with the golf club’s trajectory. This space allows players to practice without worrying about hitting ceiling fixtures or the garage door, which could disrupt their focus and performance.
In addition to height, the overall dimensions of the area must be suitable for the entire golf setup, including golf equipment and a projector for visual feedback. Sufficient width and depth ensure players have the room they need for a full swing, while using foam padding or mats can provide a safe surface that absorbs any impacts from misdirected golf balls. By prioritizing these factors, golfers can create an effective and enjoyable practice environment in their chosen location.
Evaluate Nearby Electrical Outlets for Equipment Needs
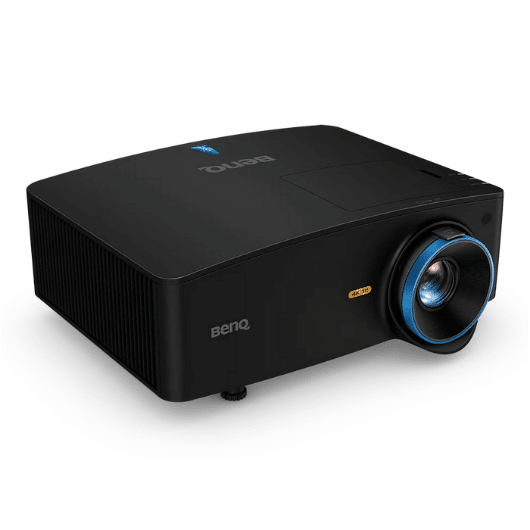
Evaluating the proximity of electrical outlets is crucial when setting up a DIY golf simulator, as many components require power. For instance, devices such as a Trackman iO, UNEEKOR EYE XO, and a BenQ projector need reliable access to electricity to function effectively. Placing these tools close to a wall with sufficient outlets simplifies the setup and avoids the hassle of extension cords, ensuring everything runs smoothly during practice sessions.
Moreover, positioning outlets strategically can keep cords out of the way, promoting a clean and organized space. This setup not only enhances safety by reducing tripping hazards but also creates a more immersive golfing experience without distractions. Ensuring that buttons or controls for the simulator are easily reachable will help users focus on their game instead of managing equipment. Proper planning around electrical needs leads to a more efficient and enjoyable golfing environment.
Avoid Areas With Distractions to Enhance Focus
Choosing a location with minimal distractions is crucial for maintaining focus during practice sessions with a DIY golf simulator. Areas like a basement can offer the necessary quiet and isolation, allowing players to concentrate on their swing mechanics without interruptions from external noise or foot traffic. This dedicated space should also have adequate height to comfortably accommodate the swing and ensure a clear view of the projection screen, enhancing the overall training experience.
Avoiding busy or cluttered environments is essential to creating an effective setup. Commercial golf simulators benefit from having a designated space that prioritizes focus, as this encourages consistent practice and improvement. By ensuring the ratio of usable space to distractions is balanced, players can more effectively analyze their performance and work on specific skills without unnecessary interruptions from their surroundings.
Select Flooring That Can Withstand Impact From Equipment
Choosing the right flooring is crucial for a DIY golf simulator setup, as it must withstand impacts from golf equipment and provide a stable surface for practice. Options like plywood can offer durability and support, making it easier for players to focus on their swings without worrying about damage to the floor. Including an underlayment can further enhance protection and absorb shock, contributing to a more realistic experience when hitting balls.
In addition to durability, the flooring should complement the overall setup by accommodating necessary equipment, such as cables for HDMI connections. A smooth surface ensures that players have a clean area for moving around, while also reducing the risk of slipping or injury. Properly selected flooring balances practicality and comfort, enhancing the user’s experience during practice sessions.
Choose Essential Equipment for Your Golf Simulator
To create an effective DIY golf simulator, it is important to identify the necessary components for a complete setup. This includes researching various launch monitors available in the market, comparing projector options suitable for sports simulation, and selecting high-quality impact screens tailored for an immersive experience. Additionally, exploring software options that provide accurate simulations and investing in comfortable mats or flooring for practice will enhance the overall functionality and enjoyment of the simulator.
Identify Necessary Components for a Complete Setup
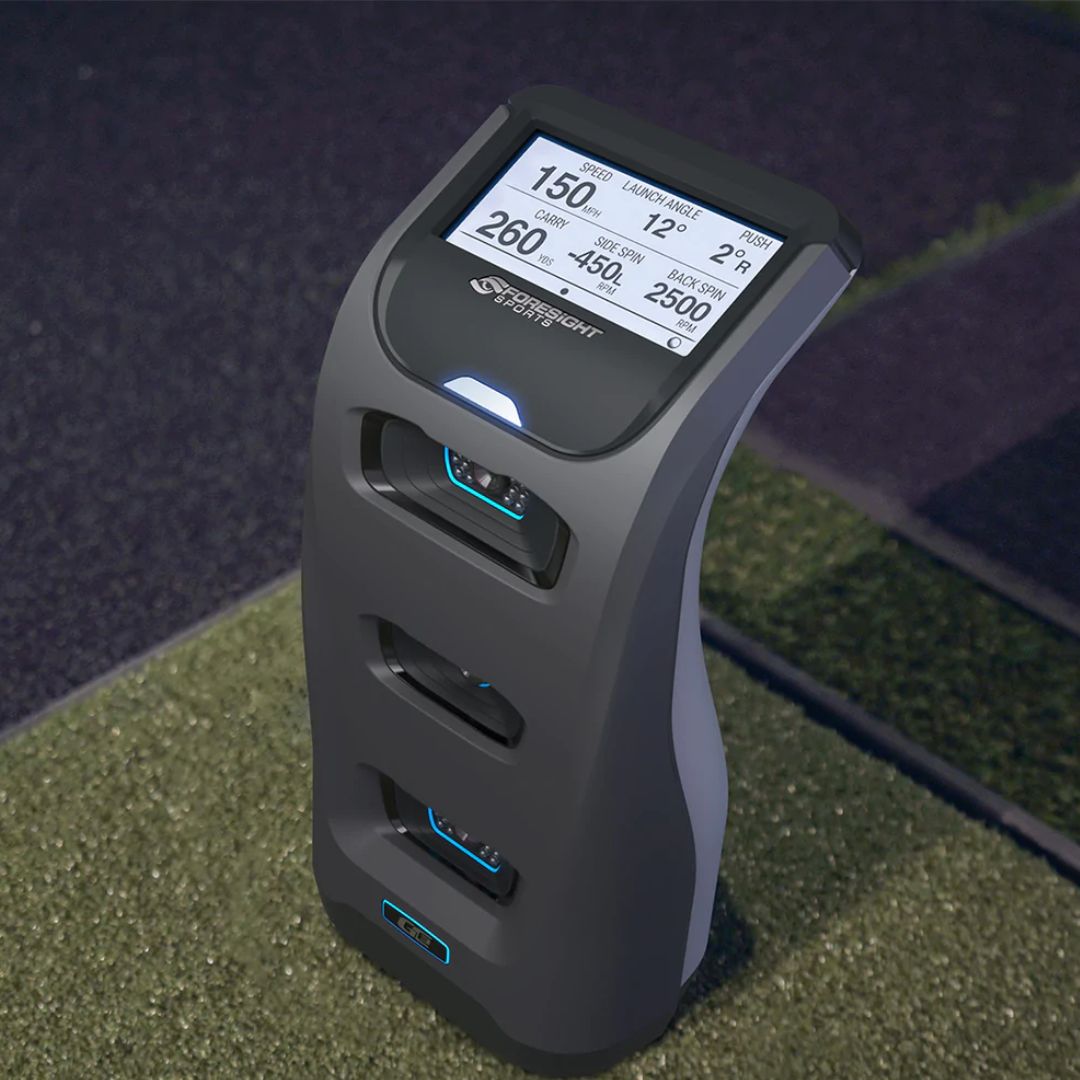
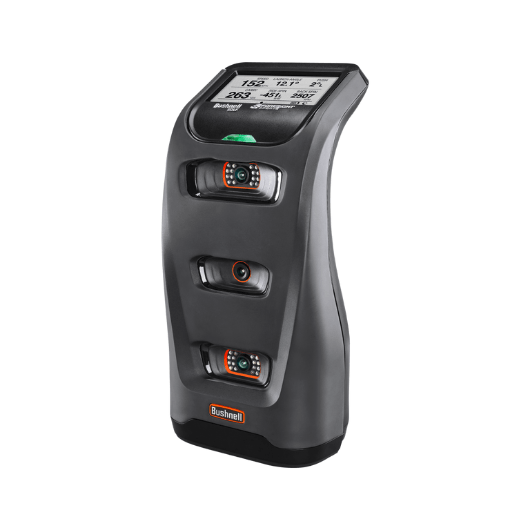
Determining the necessary components for a complete DIY golf simulator setup begins with selecting a high-quality launch monitor. This device tracks ball performance, providing vital data on swing speed, launch angle, and distance, which helps users refine their technique. Investing in a reliable launch monitor ensures players receive accurate feedback, ultimately enhancing their practice sessions.
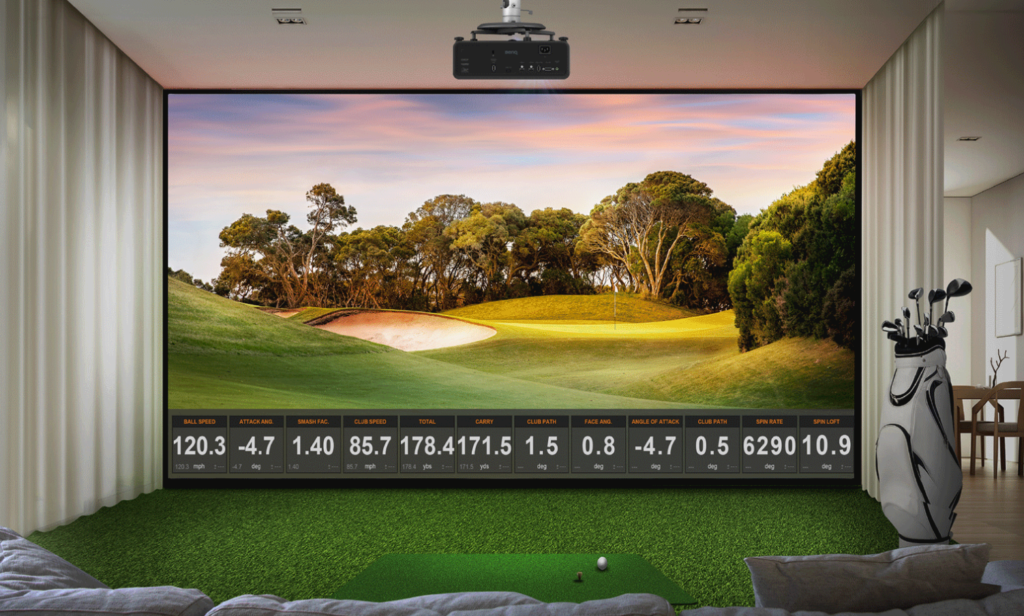
Next, a suitable projector is essential for displaying the simulated golf environment clearly. When choosing a projector, considering factors like resolution and brightness can significantly affect the overall experience. Pairing the projector with an impact screen designed for simulations enhances visuals while protecting the area from damage, creating a fully immersive training environment.
Research Various Launch Monitors Available in the Market
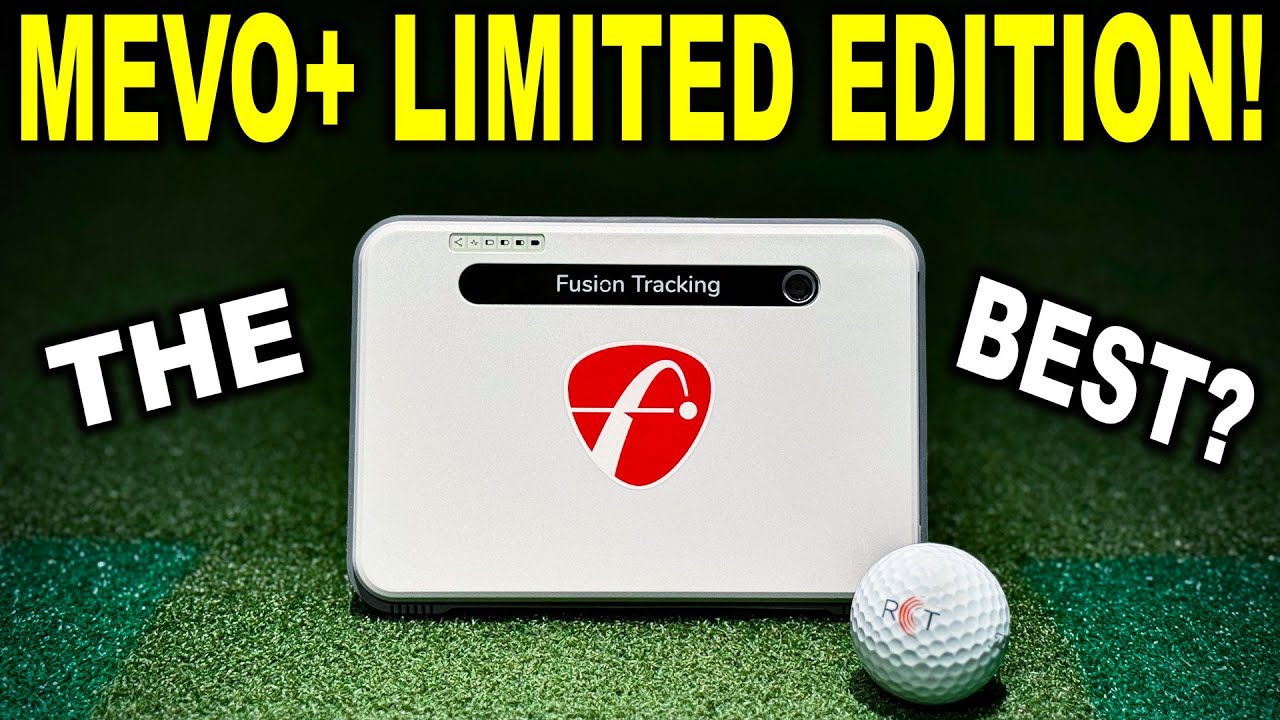
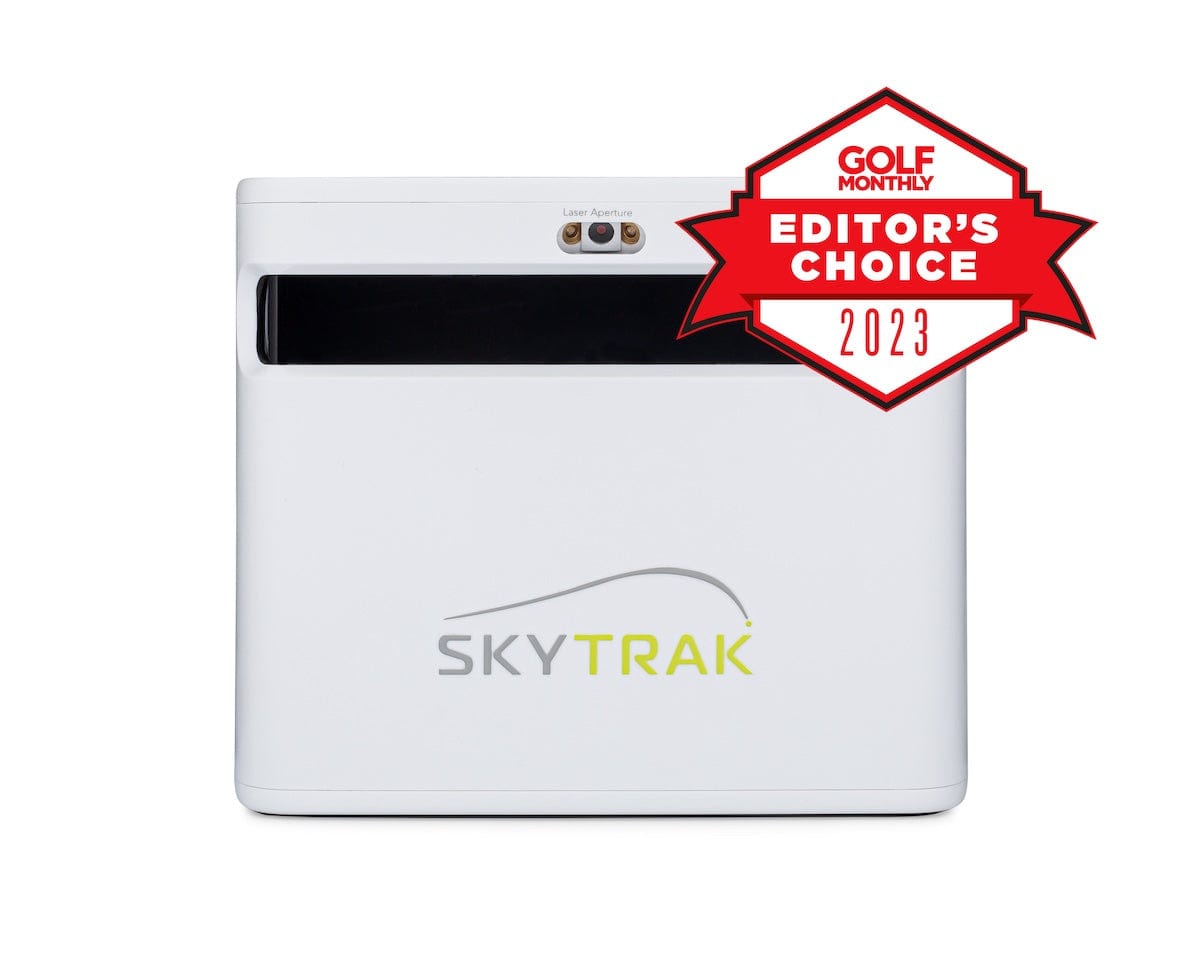
In the realm of DIY golf simulators, selecting the right launch monitor is paramount for an effective setup. Many monitors on the market vary in features such as data tracking capabilities and pricing. For example, brands like TrackMan and SkyTrak offer comprehensive ball performance metrics, which are crucial for serious golfers looking to improve their skills.
When researching various launch monitors, individuals should consider how each model supports their specific needs, such as swing analysis and simulation accuracy. Moreover, reading customer reviews and expert opinions can provide valuable insights into the reliability and usability of these devices. This knowledge will empower golfers to choose equipment that aligns with their goals, enhancing their overall practice experience.
Compare Projector Options Suitable for Sports Simulation
When comparing projector options for a DIY golf simulator, brightness and resolution are two critical factors that should be prioritized. A projector with at least 3000 lumens ensures that the visuals remain clear and vibrant, even in varying light conditions. Additionally, a resolution of 1080p or higher is recommended to maximize detail, enhancing the realism of the simulated golf environment and allowing players to focus on their performance without visual distractions.
Another vital aspect to consider is the projector’s throw distance. This measurement indicates how far the projector needs to be positioned from the screen to create a sharp image. Short-throw projectors are often ideal for smaller spaces, as they can be placed close to the screen while still producing a large image. By assessing these features, individuals can select a projector that not only fits their space but also significantly elevates the overall experience of their golf simulator setup.
Select High-Quality Impact Screens Tailored for Simulation
When selecting an impact screen for a DIY golf simulator, it is essential to prioritize quality and functionality. High-quality screens are designed to withstand the repeated impact of golf balls while providing a clear and immersive image of the simulated golf course. Using materials specifically engineered for impact resistance can significantly enhance the durability of the setup, ensuring it remains effective over time.
Additionally, choosing a screen with appropriate features can improve the overall simulation experience. For instance, impact screens with a gain rating of 1.5 or higher can enhance brightness and color accuracy, making the visuals more engaging during practice. This combination of durability and visual performance creates an ideal environment for golfers to refine their skills effectively.
Explore Software Options That Provide Accurate Simulations
Selecting the right software for a DIY golf simulator can greatly enhance the practice experience by providing accurate simulations. Many software options on the market offer detailed data analysis and various course selections, allowing players to visualize their shots in realistic settings. By opting for programs that integrate seamlessly with launch monitors, users can track essential metrics like swing speed and ball trajectory, helping them identify areas for improvement.
It’s beneficial to consider software solutions that offer customizable features, such as different difficulty levels and practice modes tailored to individual skill sets. For instance, programs like GSPRO, Trackman VG3, E6 Golf , The Golf Club are known for their user-friendly interfaces and engaging graphics, making practice sessions more enjoyable. Choosing software that provides a variety of drills and gameplay scenarios ensures that players remain motivated and can continuously refine their skills in a simulated environment.
Invest in Comfortable Mats or Flooring for Practice
Investing in comfortable mats or flooring is a crucial aspect of setting up a DIY golf simulator. High-quality mats provide a stable surface that mimics real grass, allowing players to practice their swings without discomfort or injury. Options such as foam or rubber mats can cushion impacts, enhancing the overall experience and protecting both the golfer and the flooring.
Additionally, selecting mats designed for golf practice can offer extra advantages, such as improved traction and durability. These surfaces reduce the risk of slipping during swings, ensuring that players maintain their balance and focus. Proper flooring choices not only contribute to a realistic practice environment but also enhance safety, which is essential for long-term enjoyment and practice effectiveness.
Setup the Simulator for Accurate Performance
To set up a DIY golf simulator for accurate performance, one must follow several essential steps. This includes adhering to manufacturer guidelines during equipment assembly, positioning the projector for optimal visual display, and calibrating the launch monitor for precise measurements. Additionally, securing the impact screen will prevent movement, while connecting all devices ensures seamless interaction. Finally, testing the setup with practice swings will confirm everything is functioning correctly, providing a solid foundation for effective practice.
Follow Manufacturer Guidelines for Equipment Assembly
Adhering to manufacturer guidelines during equipment assembly is essential for ensuring that a DIY golf simulator functions optimally. Each piece of equipment typically comes with specific instructions that outline how to connect components properly and avoid common pitfalls. For instance, neglecting proper installation of the launch monitor can lead to inaccurate data collection, hindering the golfer’s ability to improve their skills effectively.
Position the Projector for Optimal Visual Display
Positioning the projector correctly is vital for achieving an optimal visual display in a DIY golf simulator setup. Practitioners should aim to place the projector at a suitable distance from the impact screen, typically between 10 to 15 feet, ensuring that the image remains sharp without distortion. This approach allows users to enjoy a clear view of the simulated environment, making for a more immersive practice experience.
Another important consideration is the height at which the projector is mounted. The projector should align with the center of the impact screen to avoid any image misalignment that could disrupt gameplay. By adjusting the angle and using keystone correction settings, individuals can fine-tune the display for the best overall clarity and enjoyment, ensuring that every swing is captured accurately on the screen.
Calibrate the Launch Monitor for Precise Measurements
Calibrating the launch monitor is essential for achieving precise measurements that directly impact the effectiveness of a DIY golf simulator. This process typically involves following specific instructions provided by the manufacturer, which may include adjusting settings related to swing speed, launch angle, and ball trajectory. Performing calibration ensures that the device accurately tracks performance metrics, allowing golfers to receive reliable feedback and make informed adjustments to their technique.
Accurate calibration also considers the positioning of the launch monitor itself. Placing the device at the correct distance from the hitting area enhances its ability to capture data effectively, minimizing errors caused by misalignment. Regularly checking and recalibrating the launch monitor will help maintain its accuracy, ensuring a consistent and realistic practice experience. As a result, golfers can focus on honing their skills with confidence, knowing that the data they receive reflects their actual performance.
Secure the Impact Screen to Avoid Movement
To ensure a reliable and consistent experience in a DIY golf simulator setup, securing the impact screen is essential. Utilizing heavy-duty fasteners or a tensioning system can minimize movement during swings, which helps maintain a steady reference point for ball tracking. Properly securing the screen not only enhances visual clarity but also contributes to accurate data collection, allowing golfers to effectively assess their performance.
Installing the impact screen in a way that prevents sagging or shifting can greatly improve the simulator’s functionality. By positioning it tightly against the frame or wall, users can significantly reduce any unwanted vibrations that might occur upon impact. This dedication to securing the screen ultimately results in a more immersive experience, allowing golfers to focus wholeheartedly on their technique without distractions from movement or misalignment.
Connect All Devices to Ensure Seamless Interaction
Connecting all devices in a DIY golf simulator setup is vital to ensure seamless interaction between components. Each element, including the launch monitor, projector, and impact screen, must be linked correctly to avoid disruptions during practice. Prioritizing high-quality cables and connections reduces the risk of interference or data loss, enhancing the overall experience while providing a stable flow of information.
Properly linking devices also facilitates real-time feedback, allowing players to focus on improving their technique without worrying about technical issues. For instance, ensuring that the launch monitor feeds data accurately to the software can provide essential metrics immediately after each swing. By taking the time to check and secure all connections, users can create a reliable and efficient simulator environment that maximizes their practice sessions.
Test the Setup With Practice Swings Before Use
Testing the setup with practice swings is a crucial step to ensure that a DIY golf simulator is functioning properly before diving into serious training. Players should take several swings to check for accurate data tracking and responsiveness of the equipment. Monitoring the launch monitor during these initial swings can help identify any calibration issues that may affect performance, allowing for adjustments to be made right away.
Engaging in practice swings also provides an opportunity to assess the visual clarity of the projected image. Users can observe how well the display relates to their swing and ball trajectory, ensuring that everything is properly aligned for an optimal experience. By dedicating time to these preliminary checks, golfers can foster a reliable simulator setup that enhances their practice and contributes to skill development.
Optimize Your DIY Golf Simulator Experience
Adjusting lighting can significantly enhance visual clarity during practice sessions, while a well-integrated sound system helps create an immersive golfing environment. Maintaining comfortable temperature conditions is also essential. Setting up seating for guests and utilizing accessories like tee cups adds realism to the experience. Establishing a routine for regular maintenance checks ensures lasting performance of the DIY golf simulator setup.
Adjust Lighting for Better Visual Clarity During Sessions
Adjusting lighting is a key factor in enhancing visual clarity during practice sessions of a DIY golf simulator. Optimal lighting should achieve around 1500 lumens, as this level eliminates shadows and creates a sharp view of the projected images, ensuring users can track their ball’s path accurately. Strategically positioning lights around the simulator area helps minimize glare, providing an unobstructed and clear line of sight to the impact screen.
Incorporate Sound Systems for an Immersive Environment
Incorporating a sound system into a DIY golf simulator setup can significantly enhance the overall experience for users. Background music or realistic sound effects of a golf course setting can create an immersive environment that makes practice sessions more engaging. Investing in quality speakers or a surround sound system allows players to feel as though they are truly on the course, leading to increased enjoyment and focus during each swing.
Additionally, syncing the sound system with the simulator software can provide real-time audio feedback based on the player’s performance. Sounds of a ball being struck or hitting the green can offer immediate cues about shot quality, helping users adjust their techniques. This auditory layer adds another dimension to the practice, allowing golfers to improve their skills in a more stimulating setting while maintaining immersion throughout their training sessions.
Manage Temperature to Maintain Comfortable Conditions
Managing temperature is vital for creating a comfortable environment in a DIY golf simulator setup. Players often lose focus while practicing if the space is too hot or cold, impacting their performance and enjoyment. Utilizing a reliable heating or cooling system can help maintain a stable temperature, ensuring optimal conditions for practice sessions and enabling players to concentrate fully on their technique.
Additionally, proper ventilation is essential to enhance comfort during longer practice periods. Open windows or fans can improve air circulation, reducing stuffiness and creating a refreshing atmosphere. Players should consider monitoring the temperature and making adjustments as needed, fostering a pleasant setting that encourages consistent practice and skill development without distractions.
Set Up Seating for Guests or Spectators Nearby
Setting up seating for guests or spectators nearby enhances the overall experience of a DIY golf simulator. Comfortable chairs or benches provide a welcoming space for observers to enjoy the action, creating a more engaging atmosphere for everyone involved. Ensuring that the seating arrangement allows for a clear view of the screen will keep guests entertained while players focus on their performance.
Incorporating seating into the golf simulator setup can also foster social interactions, encouraging friendly competition or casual conversations during practice sessions. Positioning the seats at a reasonable distance from the hitting area ensures safety while still providing an intimate viewing experience. This thoughtful arrangement not only elevates the enjoyment of the simulator experience but also makes it more appealing for friends and family to participate and support the golfer through their practice journey.
Use Accessories Like Tee Cups for Realism
Using accessories like tee cups can significantly enhance the realism of a DIY golf simulator setup. These simple additions allow players to practice their tee shots just as they would on a traditional course, providing a more authentic feel during practice. Tee cups designed specifically for simulators adapt to various clubs and ball types, helping golfers maintain consistency in their performance while feeling more connected to the game.
Incorporating tee cups into the setup also supports players in developing their precision and accuracy. By replicating the conditions found on the course, such as the height of the tee, golfers can refine their skills with greater effectiveness. This attention to detail not only enhances the overall experience but also fosters a deeper understanding of shot dynamics, making practice sessions more beneficial and engaging.
Create a Routine for Regular Maintenance Checks
Creating a routine for regular maintenance checks is essential for the longevity and performance of a DIY golf simulator. Practicing consistent inspections can help identify any potential issues, such as software updates or hardware malfunctions, before they impact the overall experience. For example, checking connections and calibration settings every few weeks can prevent inaccuracies in data tracking, ensuring players receive reliable feedback during practice sessions.
Moreover, routine cleaning of the impact screen and surrounding areas can preserve visual quality and reduce wear and tear on equipment. Ensuring that the projector lens is clear and the launch monitor is properly aligned will enhance performance and provide a seamless experience. By committing to regular maintenance, users can enjoy a well-functioning simulator that supports their skill development and keeps them focused on improvement.
Enhance Skills With Engaging Practice Routines
Establishing a structured practice schedule promotes consistent improvement while incorporating targeted drills hones specific skills. Using simulator features allows for performance metric analysis, aiding players in setting personal goals to track progression. Experiencing various courses keeps practice fresh, and inviting friends for friendly competitions fosters motivation and enjoyment throughout the training journey.
Establish a Structured Practice Schedule for Improvement
Creating a structured practice schedule can significantly enhance a player’s progress in improving their golf skills. By dedicating specific times for practice within their DIY golf simulator setup, players are more likely to focus on their technique and develop a consistent routine. This intentional approach not only fosters discipline but also enables users to track their advancements over time, leading to tangible improvement in their performance.
Incorporating targeted drills into the practice schedule is equally beneficial. For instance, players might set aside days to focus on specific aspects such as putting, driving, or iron play. By varying the focus of each practice session, golfers can maintain engagement and combat monotony, turning their practice into an enjoyable experience while effectively addressing personal weaknesses in their game.
Incorporate Drills That Focus on Specific Skills
Incorporating targeted drills within a DIY golf simulator setup can significantly improve specific skills. For instance, players might focus on their putting by setting up a practice routine that simulates various putting scenarios. By adjusting the distance and angle for each drill, they can work on precision and feel, which are critical for reducing scores on the course.
Additionally, dedicated drills should address weaknesses in swing mechanics or shot accuracy. Gamifying the practice routine can keep golfers engaged; for instance, creating challenges where players aim for specific targets allows them to refine their approach while enjoying friendly competition. This structured practice approach ensures continuous improvement by helping players hone in on the areas that need development, leading to more effective training sessions.
Use Simulator Features to Analyze Performance Metrics
Utilizing simulator features to analyze performance metrics can significantly enhance a golfer’s practice sessions. By leveraging the data provided by the launch monitor, such as swing speed, ball spin, and trajectory, players can identify areas that require improvement. This detailed feedback allows individuals to make informed adjustments to their technique, ultimately leading to more effective practice and better game performance.
Set Personal Goals to Track Progression Over Time
Setting personal goals is instrumental in tracking progression over time in a DIY golf simulator setup. Players can establish measurable objectives related to specific skills, such as improving swing speed or increasing putting accuracy. By using the metrics provided by the simulator, they can assess their performance regularly, allowing for adjustments to their practice routine based on data-driven insights.
Additionally, documenting each practice session enables a golfer to monitor their advancement and stay motivated throughout their training journey. For example, if a player aims to reduce their average putt distance over a month, they can analyze their practice logs to see if they are on track. This approach not only helps maintain focus but also encourages a sense of accomplishment as improvements become evident over time.
Experiment With Various Courses in the Simulation
Experimenting with various courses in a DIY golf simulator setup can significantly enhance a player’s practice experience. By simulating different environments, golfers can adapt their strategies and techniques to suit distinct course layouts, elevations, and conditions. Trying out famous golf courses or designing custom scenarios allows players to challenge themselves and maintain interest, making practice sessions more engaging and productive.
Utilizing diverse courses also provides players with the opportunity to analyze their performance across different terrains and course designs. The variable factors, such as wind and undulating greens, require adjustments in shot selection and technique. This practice not only hones their skills but also prepares them for real-world scenarios, ultimately boosting confidence and proficiency on the course.
Invite Friends for Friendly Competitions to Stay Motivated
Inviting friends for friendly competitions in a DIY golf simulator not only adds an element of fun but also fosters motivation among players. Engaging with others during practice sessions encourages a healthy competitive spirit, pushing individuals to improve their skills while enjoying shared experiences. When friends participate, they can provide insights and support, creating an environment that enhances the overall practice routine.
Setting up challenges or mini-tournaments can make practice sessions more exciting. For instance, golfers can compete to see who can achieve the best score on a specific course or complete a series of skill-based tasks. This approach not only maintains interest but also promotes consistency in practice, as users strive to outperform each other while refining their techniques. Such interactions make the experience enjoyable and productive, ultimately leading to better performance on the course.
Troubleshoot Common DIY Golf Simulator Issues
Troubleshooting common DIY golf simulator issues is essential for maintaining optimal performance and ensuring an enjoyable practice experience. Key areas to address include identifying frequent technical problems and their solutions, inspecting equipment connections, and adjusting settings based on feedback from performance logs. Additionally, resolving software glitches, ensuring proper calibration of devices, and creating a checklist for routine diagnostics can provide practical insights for users.
Identify Frequent Technical Problems and Their Solutions
One common technical issue that DIY golf simulator users encounter is inconsistent data readings from the launch monitor. This often happens due to improper alignment or positioning of the device relative to the hitting area. To resolve this, users should carefully follow the manufacturer’s guidelines for placement, ensuring that the monitor is at the correct height and distance to accurately capture every shot. Regularly checking this alignment can significantly improve the reliability of performance metrics, aiding golfers in refining their skills more effectively.
Another frequent problem involves software glitches that affect the overall user experience. Users may notice that the simulation does not run smoothly or that it intermittently freezes during practice sessions. To address this, ensuring that the software is updated to the latest version is crucial, as developers often release patches to fix bugs and improve performance. Additionally, having a reliable internet connection when running cloud-based software can prevent interruptions, allowing for a seamless and enjoyable training environment.
Inspect Equipment Connections for Optimal Function
Inspecting equipment connections is a fundamental step in establishing an effective DIY golf simulator setup. Loose or damaged cables can lead to inconsistent data readings and performance issues. To ensure optimal function, users should routinely check that all connections between the launch monitor, projector, and computer are secure and free from wear. Each component must be connected correctly to facilitate seamless communication, preventing any interruptions during practice sessions.
Additionally, utilizing high-quality cables can further enhance the reliability of the simulator. It’s advisable for users to look for cables that are rated for the appropriate uses, such as HDMI or USB, as they can significantly affect data transfer and projection quality. Users experiencing issues should also routinely examine their equipment’s firmware, as outdated software can contribute to connection problems. By prioritizing thorough inspections, players can maintain an effective and enjoyable golf simulation experience.
Adjust Settings Based on Feedback From Performance Logs
Adjusting settings based on feedback from performance logs is crucial for optimizing a DIY golf simulator’s accuracy and effectiveness. By regularly reviewing the data collected during practice sessions, users can identify specific areas needing improvement, such as swing speed or club path. For instance, if logs indicate consistent issues with launch angle, tweaking the settings on the launch monitor can help address these discrepancies and enhance performance metrics.
Resolve Software Glitches for Smoother Operation
Resolving software glitches is key to maintaining a smooth operation of a DIY golf simulator. Users often encounter issues such as freezing screens or lag in response time during practice sessions. Regularly updating the simulation software ensures that any known bugs are fixed, enhancing overall performance and stability. Additionally, maintaining a solid internet connection can prevent disruptions, especially for cloud-based software that relies on continuous data flow.
Another helpful approach is to monitor the system requirements of the software. If the computer or device running the simulation is underpowered, it may struggle to deliver a seamless experience, leading to glitches. Upgrading hardware components, such as increasing RAM or using a faster processor, can significantly improve functionality. With these proactive measures, golfers can enjoy a more immersive and frustration-free practice environment that effectively supports skill development.
Ensure Proper Calibration of Devices for Best Results
Ensuring proper calibration of devices is essential for achieving the best results from a DIY golf simulator. Calibration involves adjusting the launch monitor settings according to specific guidelines to accurately capture performance metrics such as swing speed and ball trajectory. A correctly calibrated monitor provides reliable data, allowing golfers to identify areas for improvement and refine their technique effectively.
A common practice involves placing the launch monitor at an appropriate distance from the hitting area, typically around 6 to 10 feet, to optimize data collection. Regularly checking calibration based on the manufacturer’s recommendations can prevent inaccuracies that disrupt the training experience. Maintaining proper calibration not only enhances the simulator’s performance but also builds user confidence in the feedback received during practice sessions.
Create a Checklist for Routine Diagnostics and Fixes
Creating a checklist for routine diagnostics and fixes is a proactive approach to maintain a DIY golf simulator. Regular checks on crucial components, such as the launch monitor alignment and projector settings, can prevent miscalculations during practice sessions. This ensures that golfers can focus on refining their technique without interruptions from technical difficulties.
An effective checklist should also include inspecting all connections for wear and damage, as well as updating software to the latest versions. By establishing a routine for these diagnostics, users can quickly identify and address potential issues, thus enhancing the overall performance of their golf simulator setup. This practice not only reduces frustration but also fosters a seamless and rewarding training experience.
Conclusion
Creating an effective DIY golf simulator setup significantly enhances the practice experience for golfers. By carefully selecting the right location, ensuring proper lighting, and using quality equipment, players can foster an environment conducive to improvement. Addressing key elements like space, sound, and flooring contributes to an immersive and enjoyable training atmosphere. Ultimately, these tips empower golfers to refine their skills and elevate their game, making the effort invested in setup well worth it.